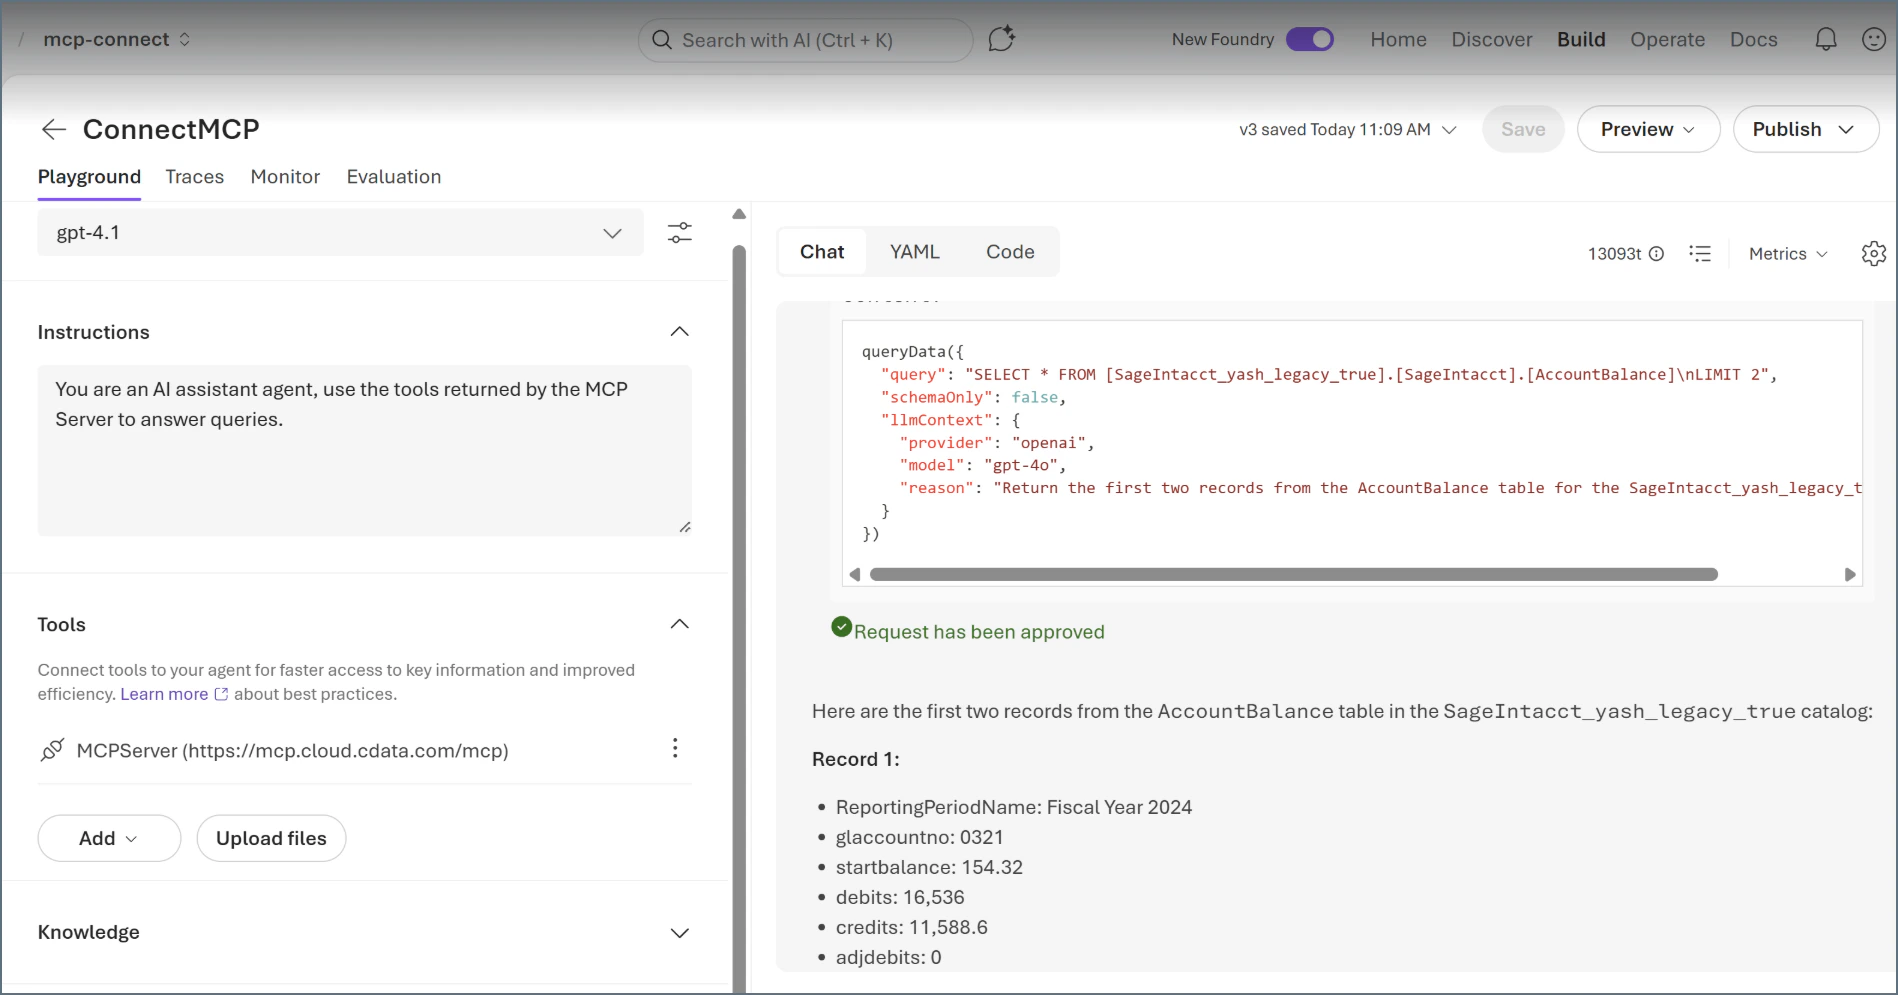
Prerequisites
Before you can configure and use Microsoft Foundry with Connect AI, you must do the following:- Connect a data source to your Connect AI account if you have not done so already. See Sources for more information.
- Generate a Personal Access Token (PAT) on the Settings page. Copy this down, as it acts as your password during authentication.
- Base64 encode your Connect AI username.
Connect Microsoft Foundry to the Connect AI MCP
1
Create a project in Microsoft Foundry.
2
Click Create Agent.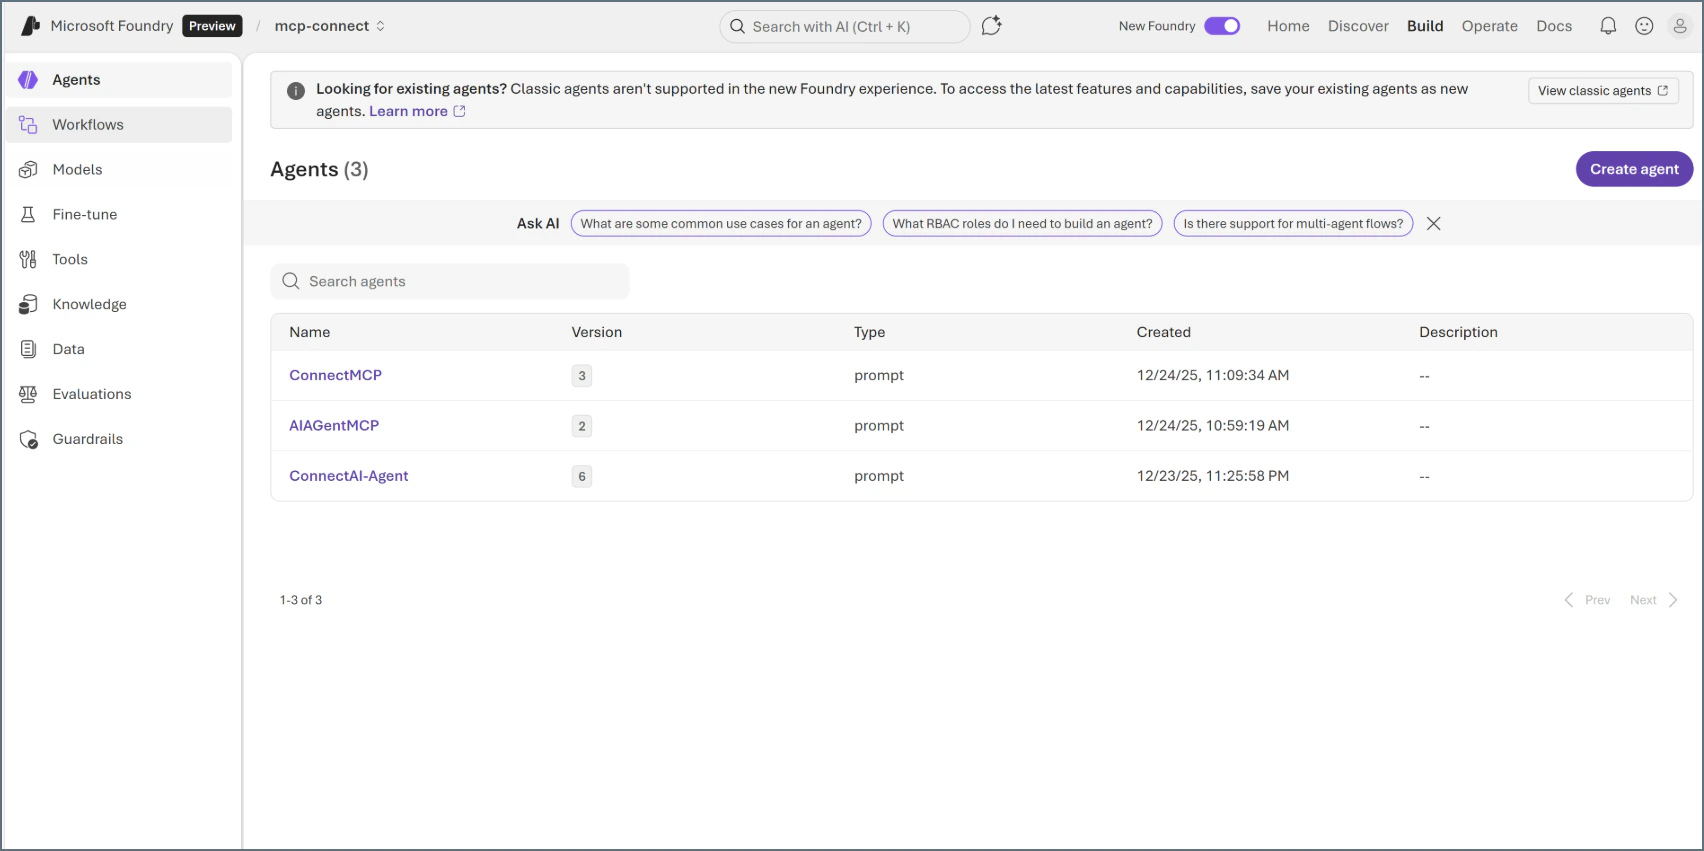
3
Provide a name for your agent, and then click Create.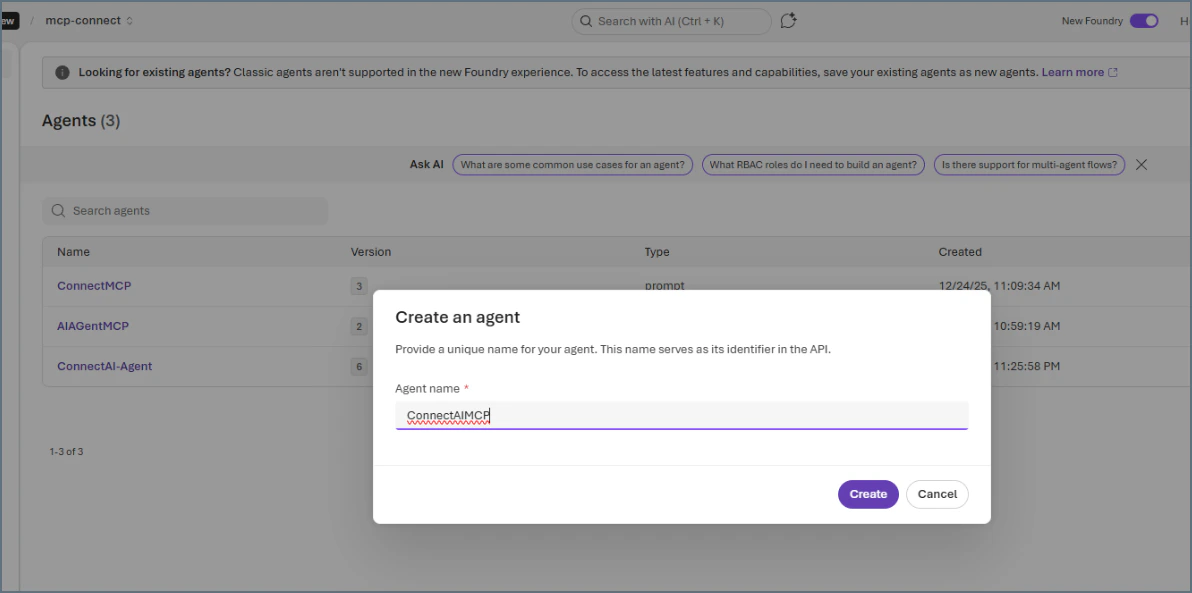
4
After naming your agent, click Save. Add instructions (optional). Under Tools, click Add.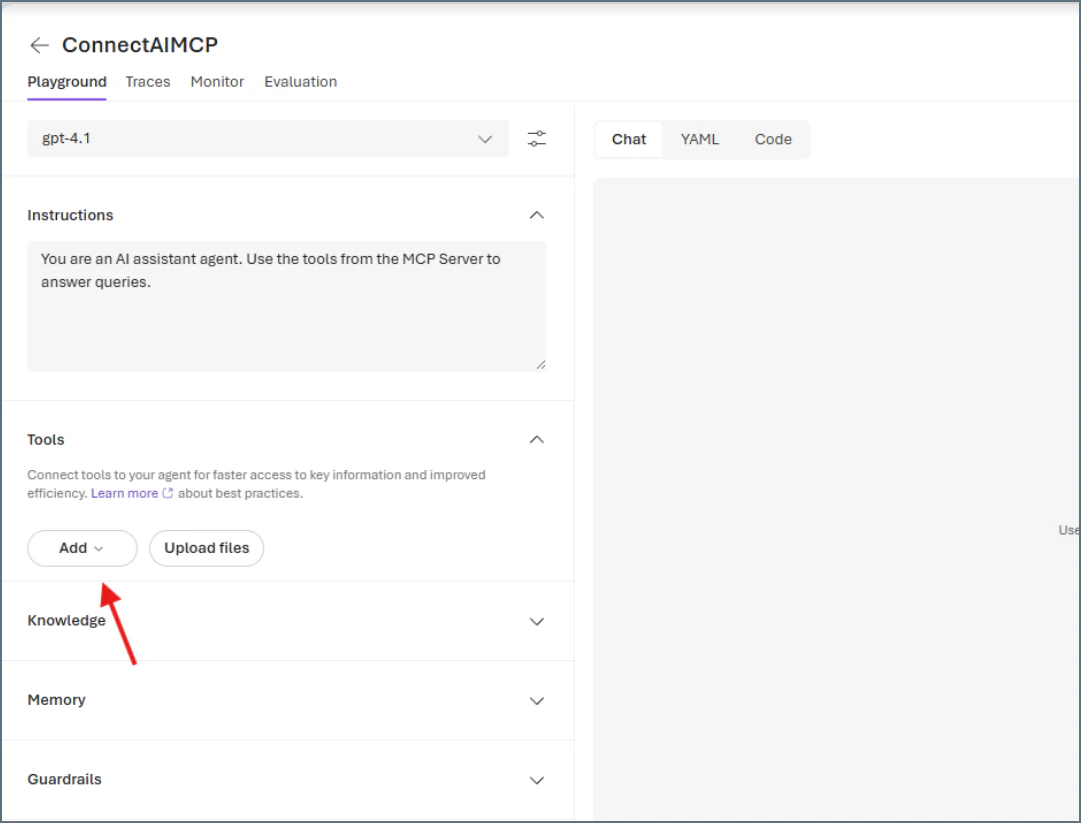
5
In the Select a tool dialog, click the Custom tab, and then click Model Context Protocol.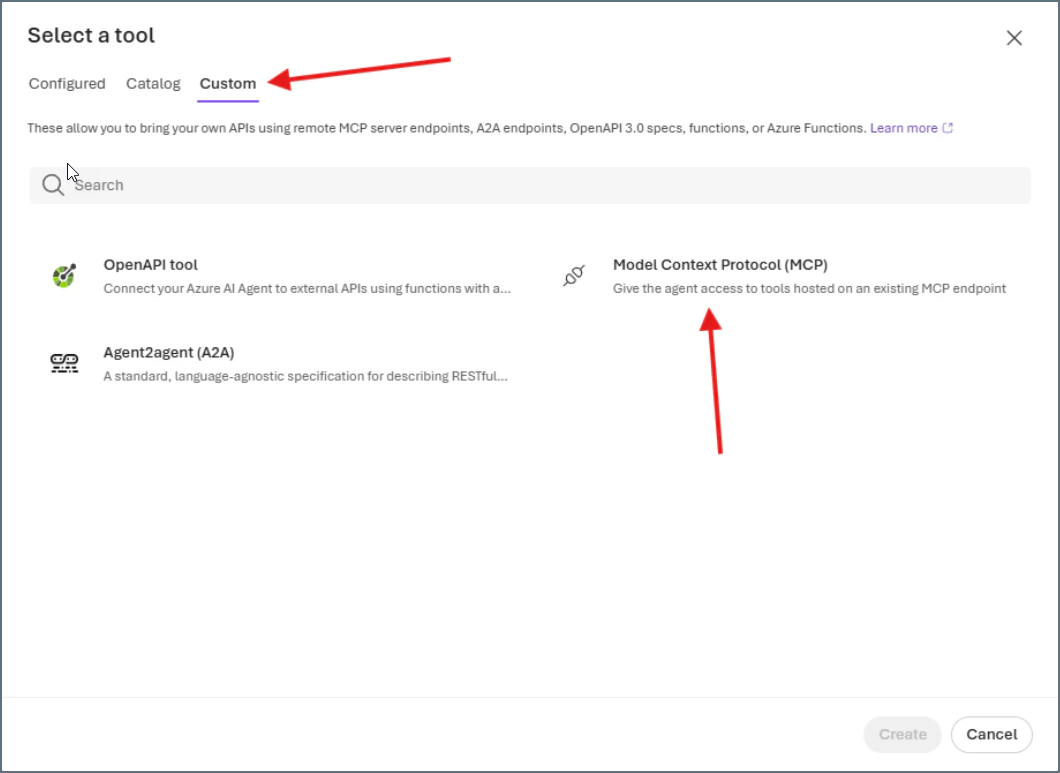
6
In the Add Model Context Protocol dialog, enter the following: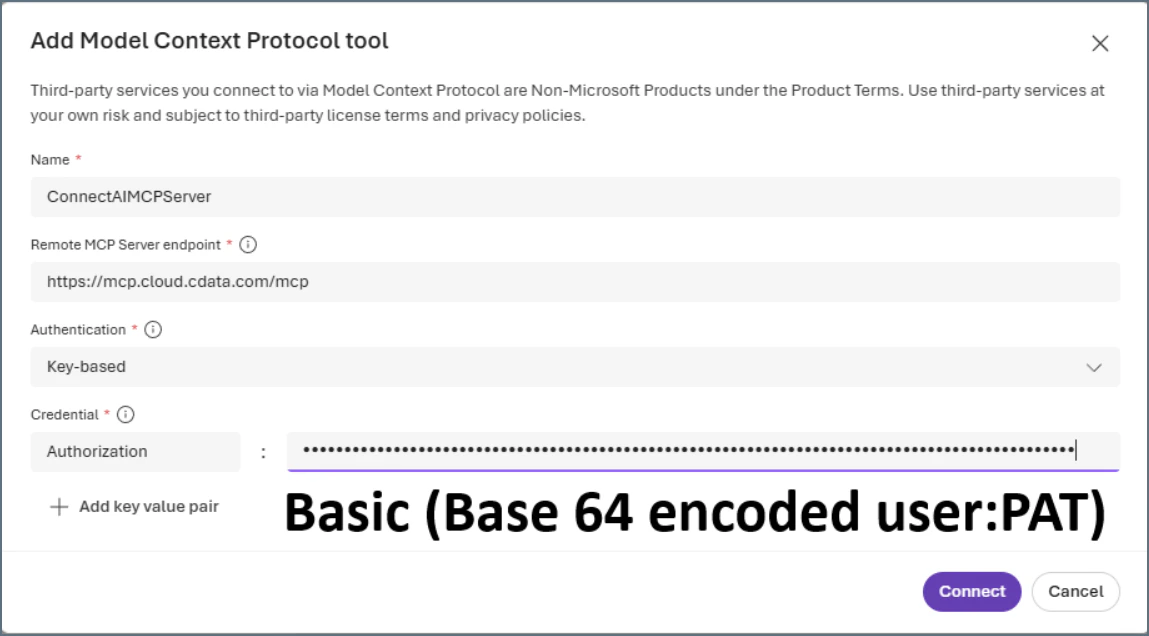
- Name–the name of your MCP server, for example, ConnectAIMCPServer.
- Remote MCP Server endpoint–https://mcp.cloud.cdata.com/mcp.
- Authentication–select Key-based.
- Credential–enter Basic(YourConnectAIUsernameConvertedToBase64:YourPersonalAccessToken), for example, Basic(anNtaXRoQGV4YW1wbGUuY29t:a1b2c3d4e5f6g7h8i9j0k1l2).
7
Click Connect. You should see the MCP server listed under Tools.
8
Click Save again to save your agent.
9
You can confirm your connection by clicking the YAML tab. You should see the following: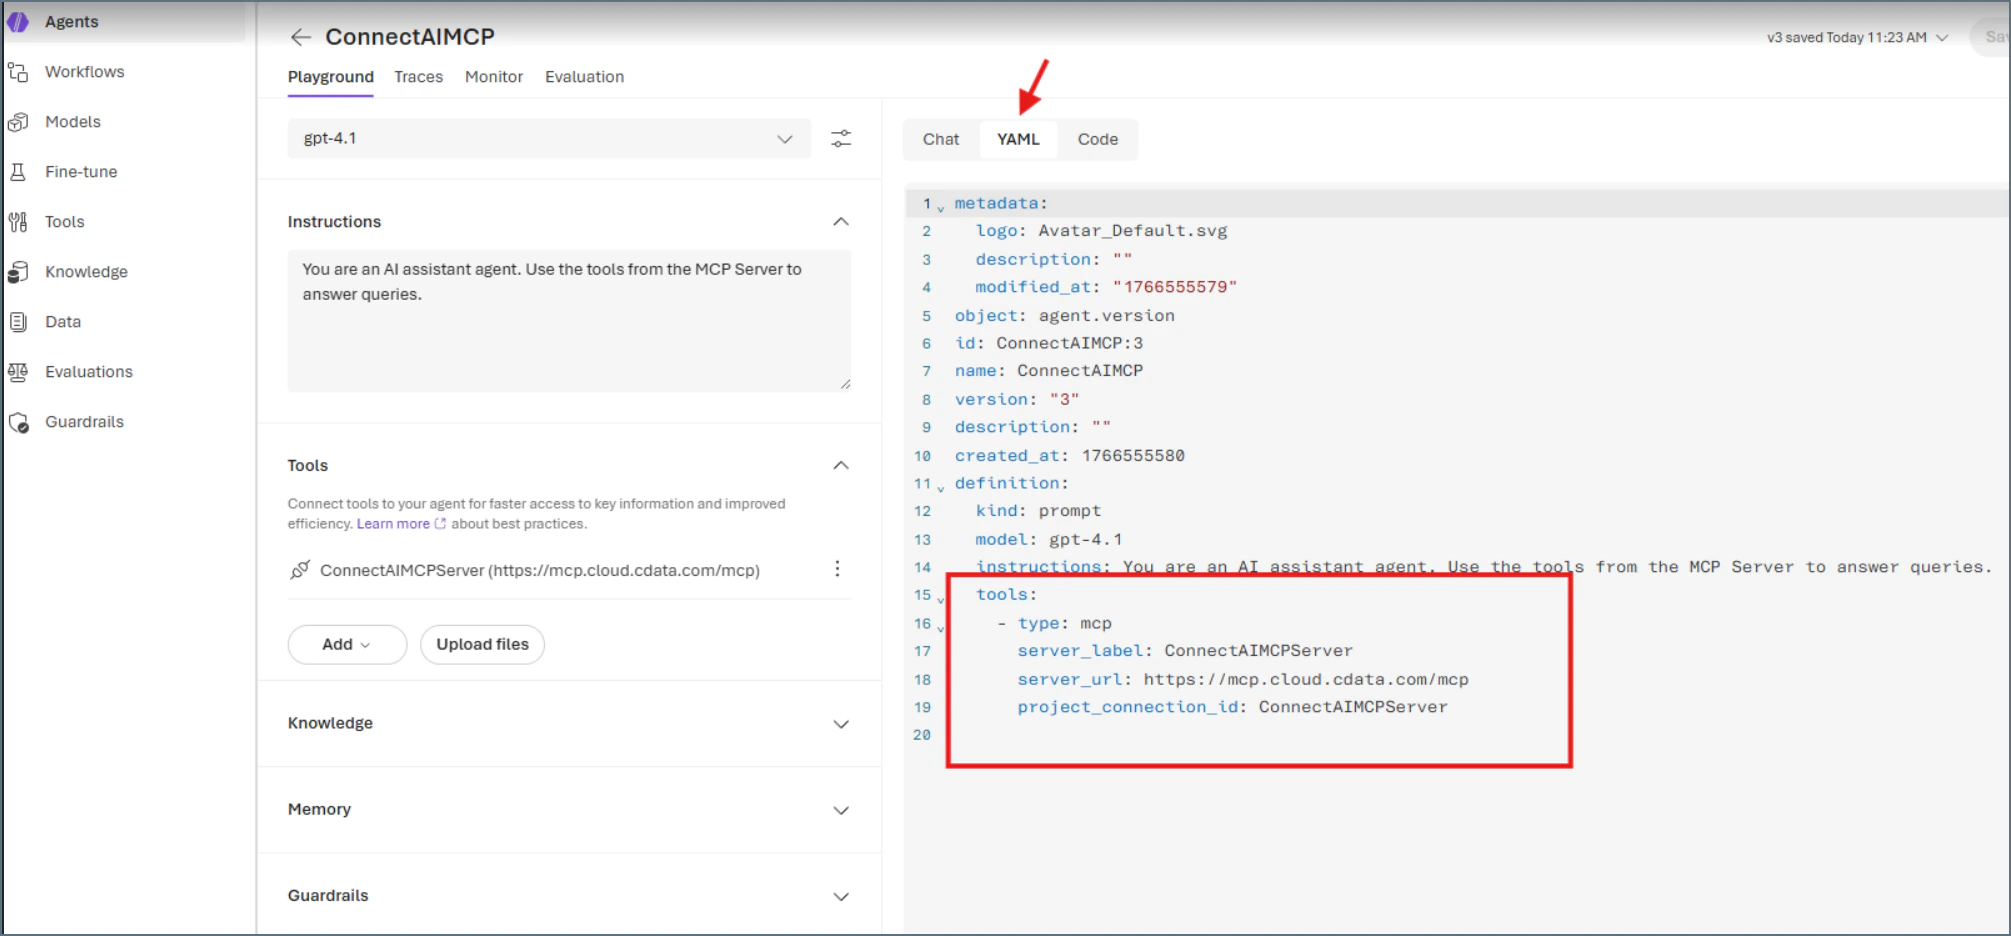
10
Click the Chat tab and ask the agent a question about your data. The agent shows the tools used to arrive at an answer.