Prerequisites
Before you can configure and use Cursor with Connect AI, you must first do the following:- Install the Cursor IDE.
- Connect a data source to your Connect AI account. See Sources for more information.
- (Basic authentication only) Generate a Personal Access Token (PAT) on the Settings page. Copy this down, as it acts as your password during authentication.
-
(Basic authentication only) Base64-encode your Connect AI credentials in the following format:
Base64("email:PAT").
Connect to Connect AI
OAuth Authentication
1
In the Cursor IDE, go to Cursor Settings. Then click Tools & MCP, and then click New MCP Server. The file
mcp.json opens automatically in the Cursor IDE.2
Copy and paste the following into the
mcp.json file.3
Return to Tools & MCP under Cursor Settings. Cursor detects that the server requires OAuth and prompts you to log in. Cursor opens your browser to the Connect AI sign-in page. Complete the sign-in to authorize the connection.
4
Confirm that Cursor is connected to CData’s MCP Server. You should see cdata-mcp listed with a green indicator.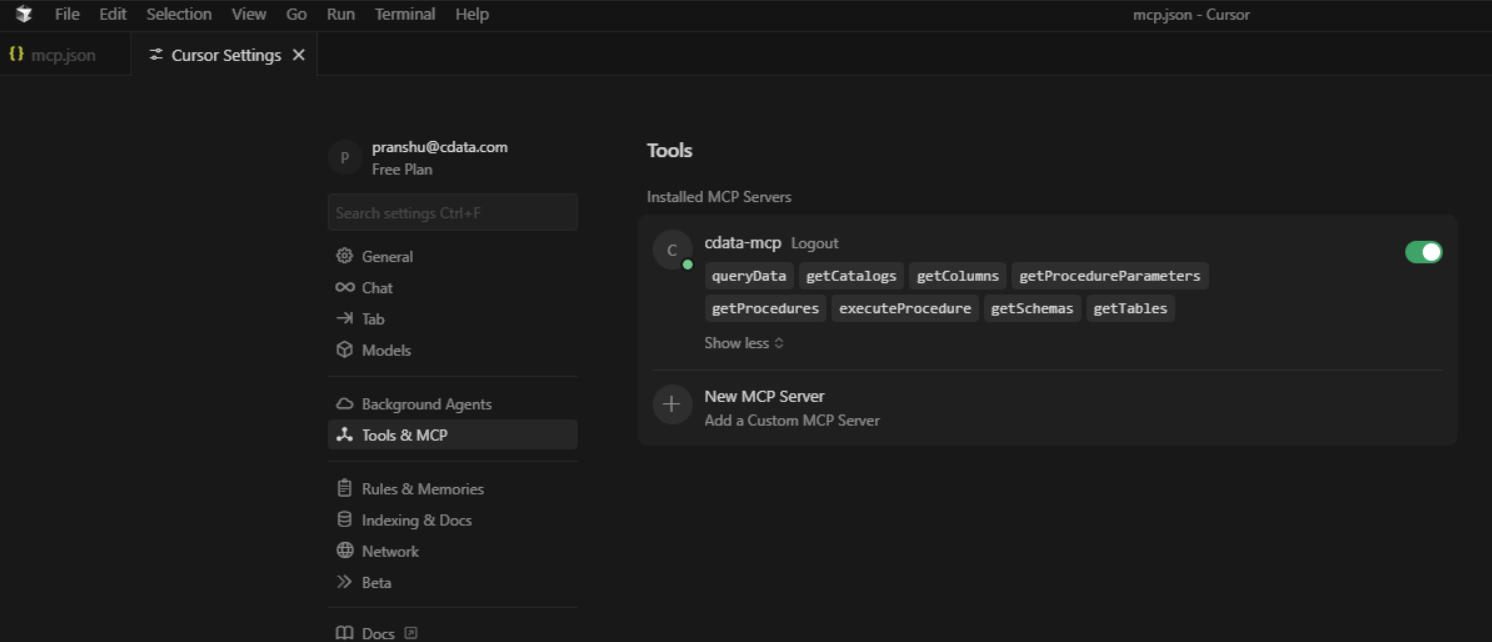
Basic Authentication
1
In the Cursor IDE, go to Cursor Settings. Then click Tools & MCP, and then click New MCP Server. The file
mcp.json opens automatically in the Cursor IDE.2
Copy and paste the following into the
mcp.json file. Replace the authorization header with the Base64-encoded credentials obtained in the prerequisites.3
Return to Tools & MCP under Cursor Settings. Confirm that Cursor is connected to CData’s MCP Server. You should see cdata-mcp listed with a green indicator.
Chat with Cursor
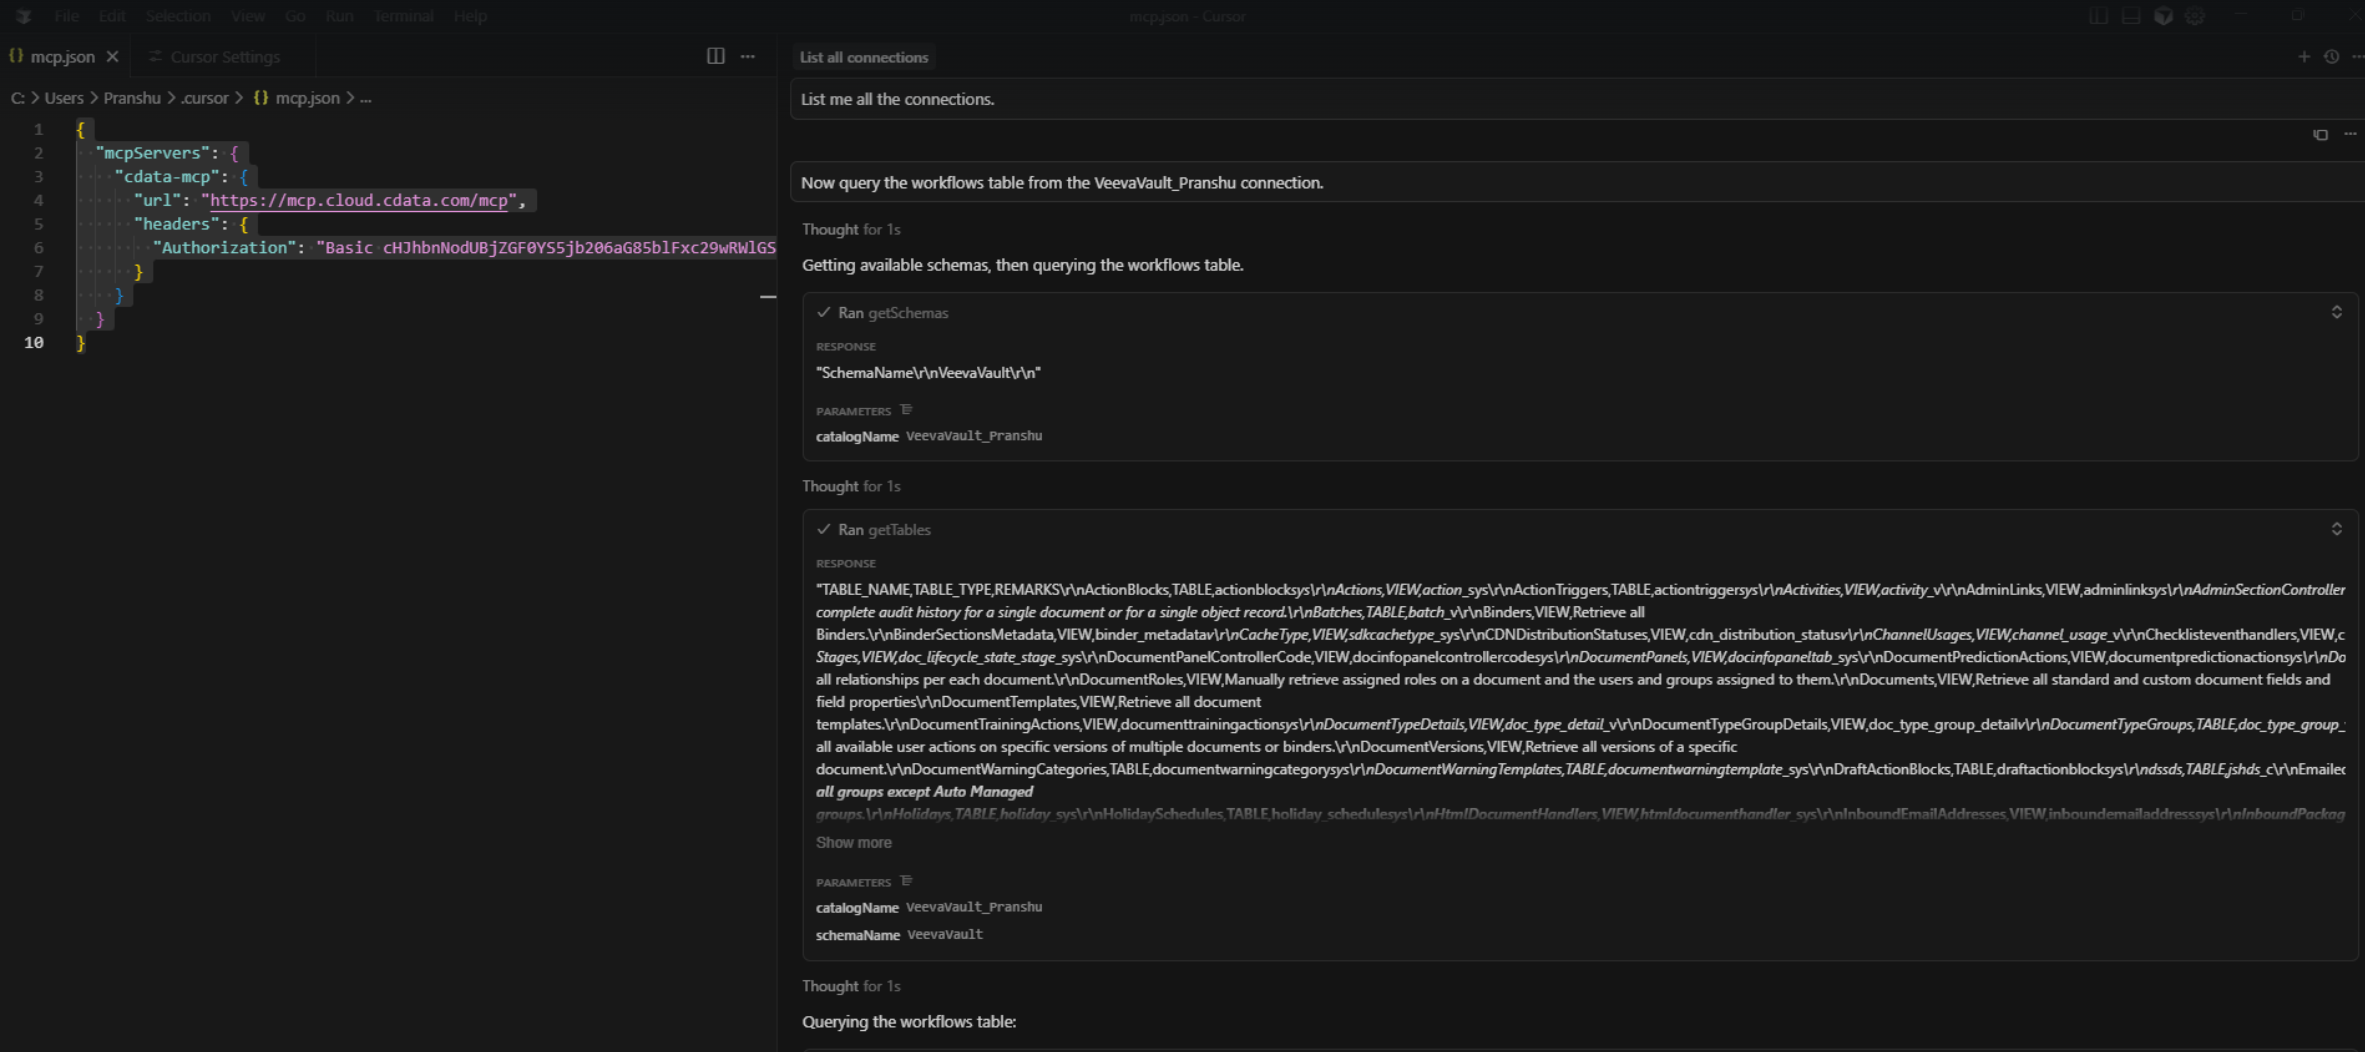
You can now chat with the assistant. Cursor lists the available tools, the connections, and a result set of a given table of a given connection. By default, Cursor asks for confirmation before executing MCP tool actions.