> ## Documentation Index
> Fetch the complete documentation index at: https://docs.cloud.cdata.com/llms.txt
> Use this file to discover all available pages before exploring further.
# Qlik Sense
> This page outlines the steps to connect Qlik Sense to Connect AI. You can use either Connect AI Virtual SQL Server API or the Connect AI OData endpoint to connect.
## Prerequisites for Connecting via Virtual SQL Server API
Before you connect via Virtual SQL Server API, you must first do the following:
* Connect a data source to your Connect AI account. See [Sources](/en/Sources) for more information.
* Generate a Personal Access Token (PAT) on the [Settings](/en/Settings#personal-access-tokens) page. Copy this down, as it acts as your password during authentication.
## Connect to Connect AI via Virtual SQL Server API
To establish a connection from Qlik Sense to the Connect AI Virtual SQL Server API, follow these steps.
Log in to Qlik Sense.
On the home dashboard, click **Create** > **Data connection**. Click **+** to create a new connection.
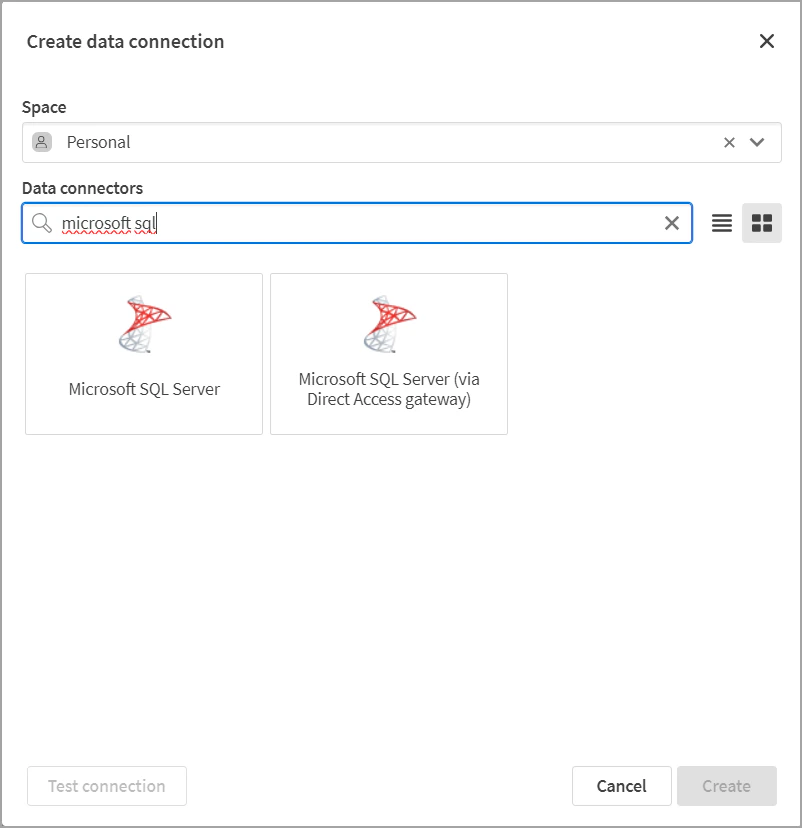
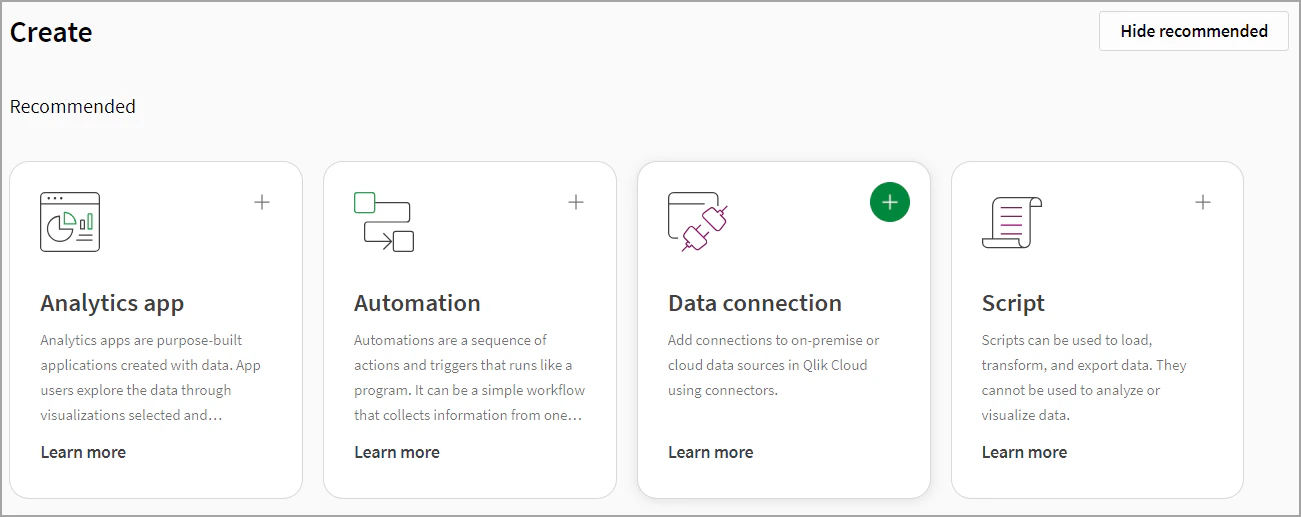 In the **Create data connection** dialog, enter *Microsoft SQL Server* in the search bar. Click the **Microsoft SQL Server** button that appears below.
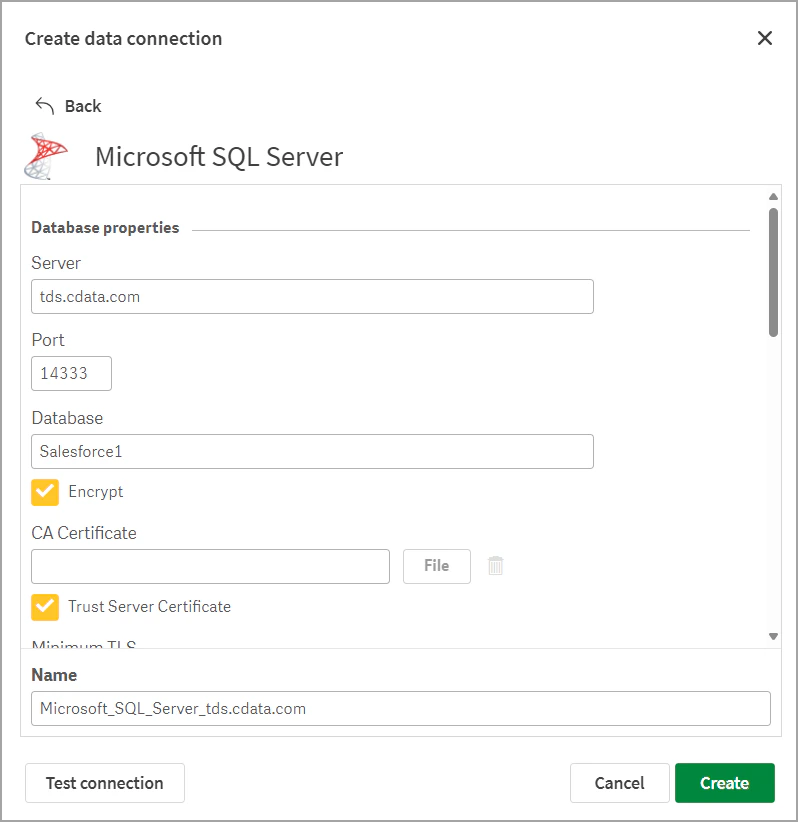
 Enter the connection settings.
* Database Properties
* **Server**—enter *tds.cdata.com*
* **Port**—enter *14333*
* **Database**—enter the Connection Name of the Connect AI data source you want to connect to (for example, *Salesforce1*).
* **Encrypt**—check this box, but do not upload a certificate file.
* **Trust Server Certificate**—check this box.
* **Minimum TLS**—leave as **1.0**.
* Authentication
* **Use Trusted Connection**—leave unchecked.
* **Use NTLM**—leave unchecked.
* Account properties
* **User defined credentials**—set this according to your needs.
* **User name**—enter your Connect AI username. This is displayed in the top-right corner of the Connect AI interface. For example, *[test@cdata.com](mailto:test@cdata.com)*.
* **Password**—enter the PAT you generated on the [Settings](/en/Settings#personal-access-tokens) page.
* Leave the settings below Account Properties blank and unchecked.
Enter the connection settings.
* Database Properties
* **Server**—enter *tds.cdata.com*
* **Port**—enter *14333*
* **Database**—enter the Connection Name of the Connect AI data source you want to connect to (for example, *Salesforce1*).
* **Encrypt**—check this box, but do not upload a certificate file.
* **Trust Server Certificate**—check this box.
* **Minimum TLS**—leave as **1.0**.
* Authentication
* **Use Trusted Connection**—leave unchecked.
* **Use NTLM**—leave unchecked.
* Account properties
* **User defined credentials**—set this according to your needs.
* **User name**—enter your Connect AI username. This is displayed in the top-right corner of the Connect AI interface. For example, *[test@cdata.com](mailto:test@cdata.com)*.
* **Password**—enter the PAT you generated on the [Settings](/en/Settings#personal-access-tokens) page.
* Leave the settings below Account Properties blank and unchecked.
 Click **Test connection** to test your entered credentials. If you receive an error, check all fields and try again.
Click **Create** to create the connection.
Your connection is now available for data analysis.
## Prerequisites for Connecting via OData Endpoint
Before you connect to Connect AI via the OData endpoint, you must first do the following:
* Connect a data source to your Connect AI account. See [Sources](/en/Sources) for more information.
* Create a [Workspace](/en/Workspaces). Later, you will use the **OData Service URL** on that page (*[https://cloud.cdata.com/api/odata/\{workspace\\\_name}](https://cloud.cdata.com/api/odata/\{workspace\\_name})*) with the relevant workspace name to establish the connection.
* Generate a Personal Access Token (PAT) on the [Settings](/en/Settings#personal-access-tokens) page. Copy this down, as it acts as your password during authentication.
## Connect to Connect AI via OData Endpoint
To connect to Connect AI using the OData protocol, follow these steps.
Log in to Qlik Sense.
On the home dashboard, click **Create** > **Data connection**. Click **+** to create a new connection.
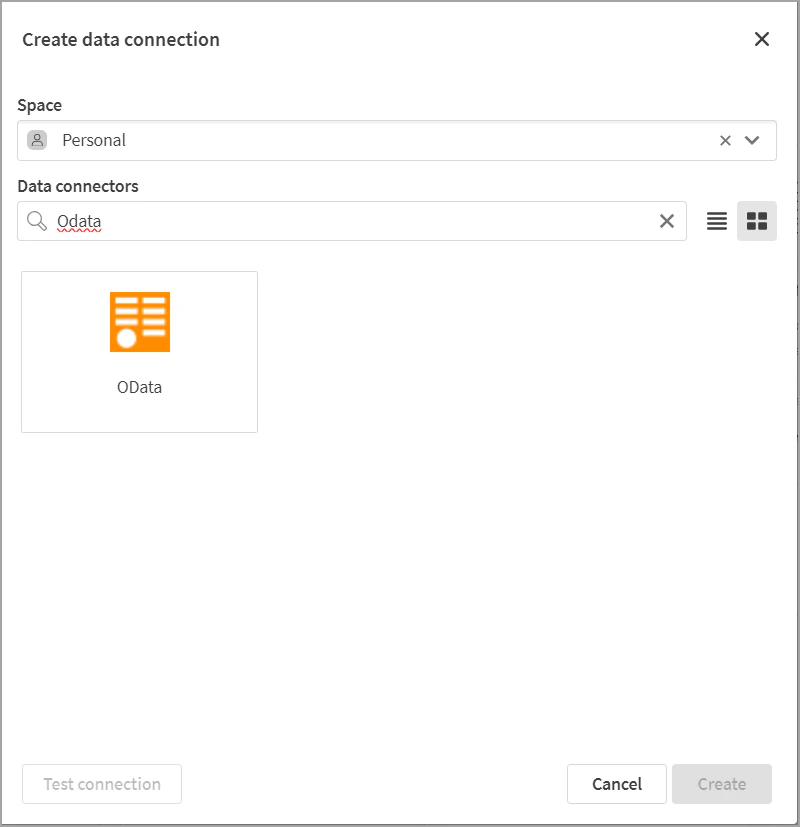
In the **Create data connection** dialog, enter *OData* in the search bar. Click the **OData** connector that appears below.
Click **Test connection** to test your entered credentials. If you receive an error, check all fields and try again.
Click **Create** to create the connection.
Your connection is now available for data analysis.
## Prerequisites for Connecting via OData Endpoint
Before you connect to Connect AI via the OData endpoint, you must first do the following:
* Connect a data source to your Connect AI account. See [Sources](/en/Sources) for more information.
* Create a [Workspace](/en/Workspaces). Later, you will use the **OData Service URL** on that page (*[https://cloud.cdata.com/api/odata/\{workspace\\\_name}](https://cloud.cdata.com/api/odata/\{workspace\\_name})*) with the relevant workspace name to establish the connection.
* Generate a Personal Access Token (PAT) on the [Settings](/en/Settings#personal-access-tokens) page. Copy this down, as it acts as your password during authentication.
## Connect to Connect AI via OData Endpoint
To connect to Connect AI using the OData protocol, follow these steps.
Log in to Qlik Sense.
On the home dashboard, click **Create** > **Data connection**. Click **+** to create a new connection.
In the **Create data connection** dialog, enter *OData* in the search bar. Click the **OData** connector that appears below.
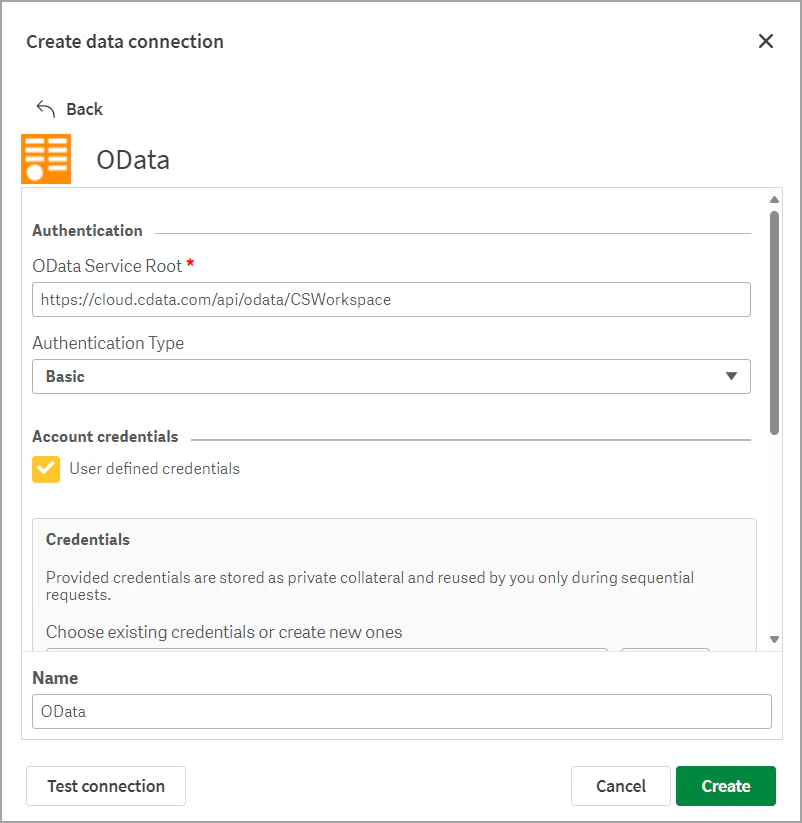
 Enter the connection settings for OData.
* Authentication
* **OData Service Root**—*[https://cloud.cdata.com/api/odata/\{workspace\\\_name}](https://cloud.cdata.com/api/odata/\{workspace\\_name})*
* **Authentication Type**—select **Basic**.
* Account credentials
* **User defined credentials**—set this according to your needs.
* **Credentials name**—enter a user-defined name for your credentials, if necessary.
* **User name**—enter your Connect AI username. This is displayed in the top-right corner of the Connect AI interface. For example, *[test@cdata.com](mailto:test@cdata.com)*.
* **Password**—enter the PAT you generated on the [Settings](/en/Settings#personal-access-tokens) page.
* **Auth header**—leave this blank.
Enter the connection settings for OData.
* Authentication
* **OData Service Root**—*[https://cloud.cdata.com/api/odata/\{workspace\\\_name}](https://cloud.cdata.com/api/odata/\{workspace\\_name})*
* **Authentication Type**—select **Basic**.
* Account credentials
* **User defined credentials**—set this according to your needs.
* **Credentials name**—enter a user-defined name for your credentials, if necessary.
* **User name**—enter your Connect AI username. This is displayed in the top-right corner of the Connect AI interface. For example, *[test@cdata.com](mailto:test@cdata.com)*.
* **Password**—enter the PAT you generated on the [Settings](/en/Settings#personal-access-tokens) page.
* **Auth header**—leave this blank.
 Click **Test connection** to test your entered credentials. If you receive an error, check all fields and try again.
Click **Create** to create the connection.
Your connection is now available for data analysis.
Click **Test connection** to test your entered credentials. If you receive an error, check all fields and try again.
Click **Create** to create the connection.
Your connection is now available for data analysis.