> ## Documentation Index
> Fetch the complete documentation index at: https://docs.cloud.cdata.com/llms.txt
> Use this file to discover all available pages before exploring further.
# MicroStrategy
> This page outlines the steps to connect MicroStrategy to Connect AI. You can use either Connect AI Virtual SQL Server API or the Connect AI OData endpoint to connect. Note that the Virtual SQL Server API performs better for large datasets, while OData performs well with smaller datasets.
## Prerequisites for Connecting via Virtual SQL Server API
Before you connect via Virtual SQL Server API, you must first do the following:
* Connect a data source to your Connect AI account. See [Sources](/en/Sources) for more information.
* Generate a Personal Access Token (PAT) on the [Settings](/en/Settings#personal-access-tokens) page. Copy this down, as it acts as your password during authentication.
## Connect to Connect AI via Virtual SQL Server API
To establish a connection from MicroStrategy to the Connect AI Virtual SQL Server API, follow these steps.
Log in to MicroStrategy.
Click **Add External Data** > **Databases**.
Set the **Import Option** to **Select Tables**.
In the **Import from Tables** wizard, click "+" to add a new data source.
Set the connection properties.
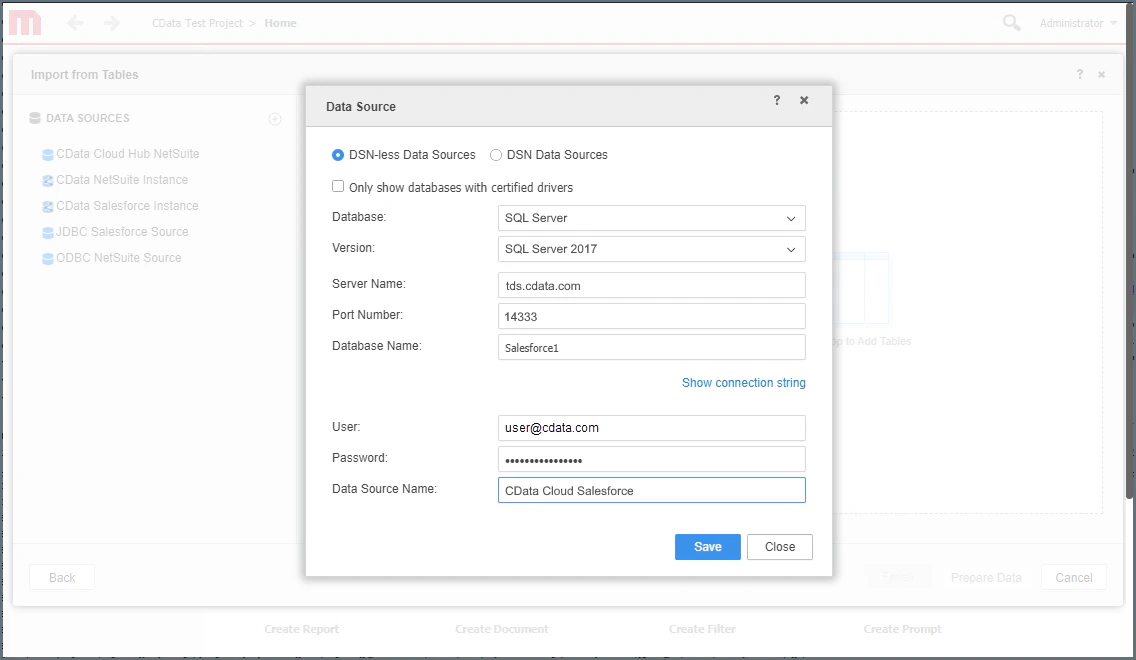 * **Database**—select **SQL Server**
* **Version**—select **SQL Server 2017**
* **Server Name**—enter *tds.cdata.com*
* **Port Number**—enter *14333*
* **Database Name**—enter the Connection Name of the Connect AI data source you want to connect to (for example, *Salesforce1*).
* **User**—enter your Connect AI username. This is displayed in the top-right corner of the Connect AI interface. For example, *[test@cdata.com](mailto:test@cdata.com)*.
* **Password**—enter the PAT you generated on the [Settings](/en/Settings#personal-access-tokens) page.
* **Data Source Name**—enter a name for the data source
Click **Save**.
Right-click on the new data source and select **Edit Catalog Options**.
* **Database**—select **SQL Server**
* **Version**—select **SQL Server 2017**
* **Server Name**—enter *tds.cdata.com*
* **Port Number**—enter *14333*
* **Database Name**—enter the Connection Name of the Connect AI data source you want to connect to (for example, *Salesforce1*).
* **User**—enter your Connect AI username. This is displayed in the top-right corner of the Connect AI interface. For example, *[test@cdata.com](mailto:test@cdata.com)*.
* **Password**—enter the PAT you generated on the [Settings](/en/Settings#personal-access-tokens) page.
* **Data Source Name**—enter a name for the data source
Click **Save**.
Right-click on the new data source and select **Edit Catalog Options**.
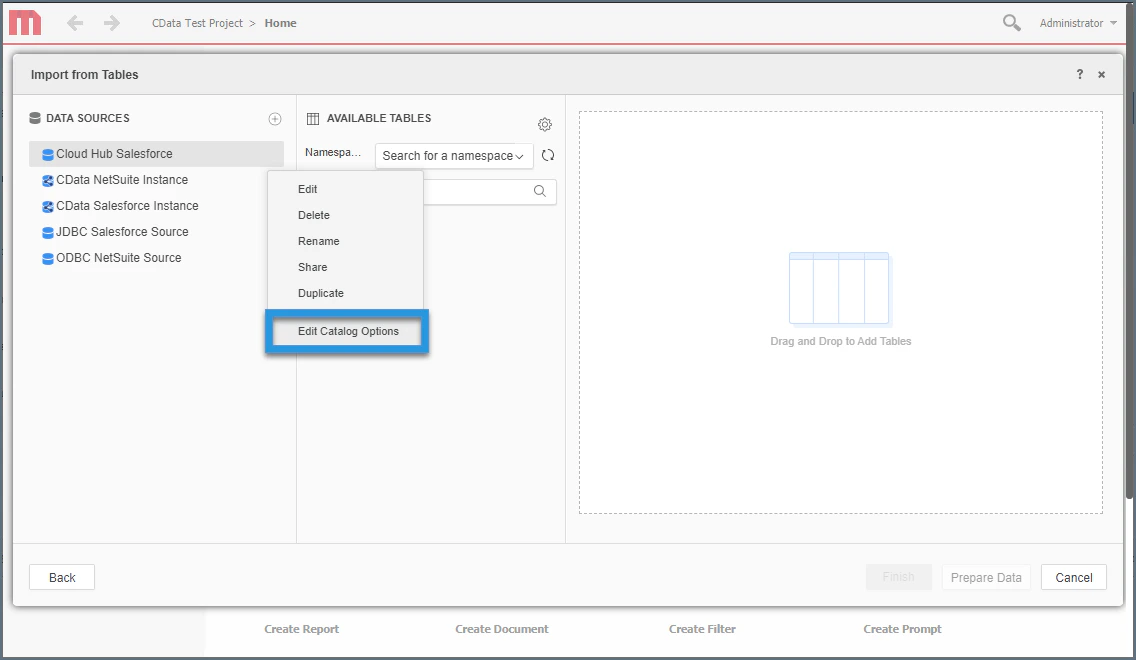 Edit the SQL column retrieval query to include `TABLE_SCHEMA = '#?Schema_Name?#'` in the WHERE clause. The complete query is below.
```bash theme={null}
SELECT DISTINCT
TABLE_SCHEMA NAME_SPACE,
TABLE_NAME TAB_NAME,
COLUMN_NAME COL_NAME,
(CASE
WHEN
(DATA_TYPE LIKE '%char' AND (CHARACTER_SET_NAME='utf8' OR CHARACTER_SET_NAME='usc2'))
THEN
CONCAT('a',DATA_TYPE)
ELSE
DATA_TYPE
END) DATA_TYPE,
CHARACTER_MAXIMUM_LENGTH DATA_LEN,
NUMERIC_PRECISION DATA_PREC,
NUMERIC_SCALE DATA_SCALE
FROM
INFORMATION_SCHEMA.COLUMNS
WHERE
TABLE_NAME
IN
(#TABLE_LIST#) AND TABLE_SCHEMA='#?Schema_Name?#'
ORDER BY
1,2,3
```
Click **Apply** > **OK**.
Select the new data source and select the Namespace that corresponds to your virtual database (like SharePoint1).
Edit the SQL column retrieval query to include `TABLE_SCHEMA = '#?Schema_Name?#'` in the WHERE clause. The complete query is below.
```bash theme={null}
SELECT DISTINCT
TABLE_SCHEMA NAME_SPACE,
TABLE_NAME TAB_NAME,
COLUMN_NAME COL_NAME,
(CASE
WHEN
(DATA_TYPE LIKE '%char' AND (CHARACTER_SET_NAME='utf8' OR CHARACTER_SET_NAME='usc2'))
THEN
CONCAT('a',DATA_TYPE)
ELSE
DATA_TYPE
END) DATA_TYPE,
CHARACTER_MAXIMUM_LENGTH DATA_LEN,
NUMERIC_PRECISION DATA_PREC,
NUMERIC_SCALE DATA_SCALE
FROM
INFORMATION_SCHEMA.COLUMNS
WHERE
TABLE_NAME
IN
(#TABLE_LIST#) AND TABLE_SCHEMA='#?Schema_Name?#'
ORDER BY
1,2,3
```
Click **Apply** > **OK**.
Select the new data source and select the Namespace that corresponds to your virtual database (like SharePoint1).
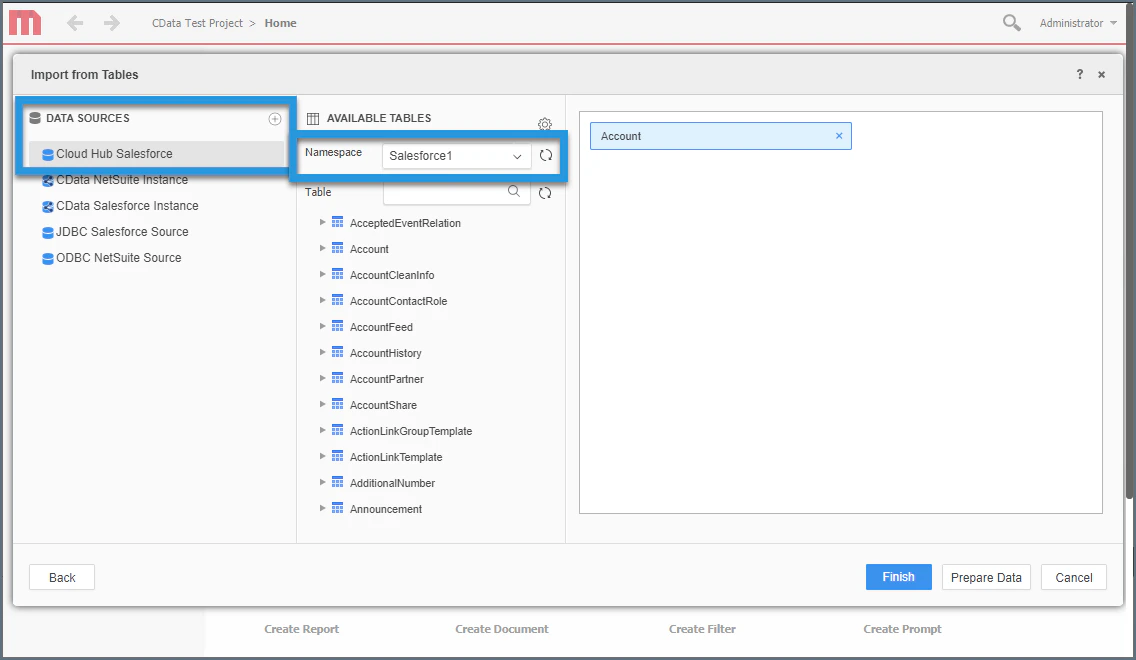 Drag tables into the pane to insert them.
Click **Finish** and choose the option to connect live.
Click **Create Dossier**.
Drag tables into the pane to insert them.
Click **Finish** and choose the option to connect live.
Click **Create Dossier**.
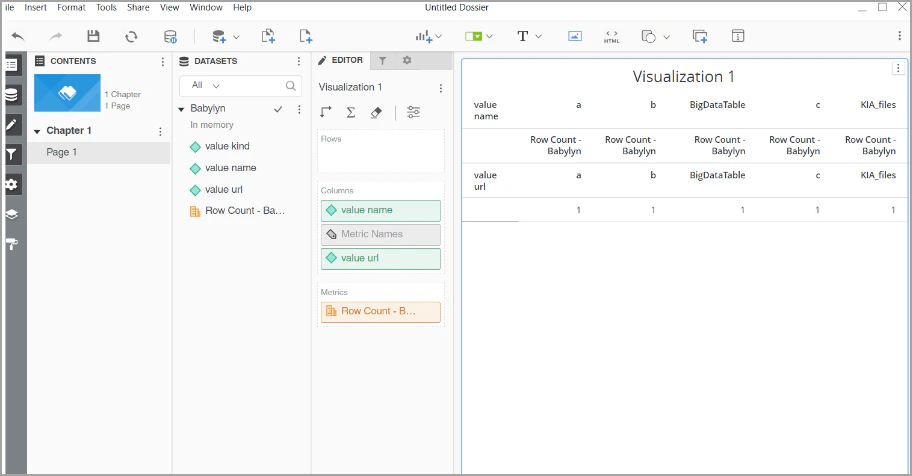
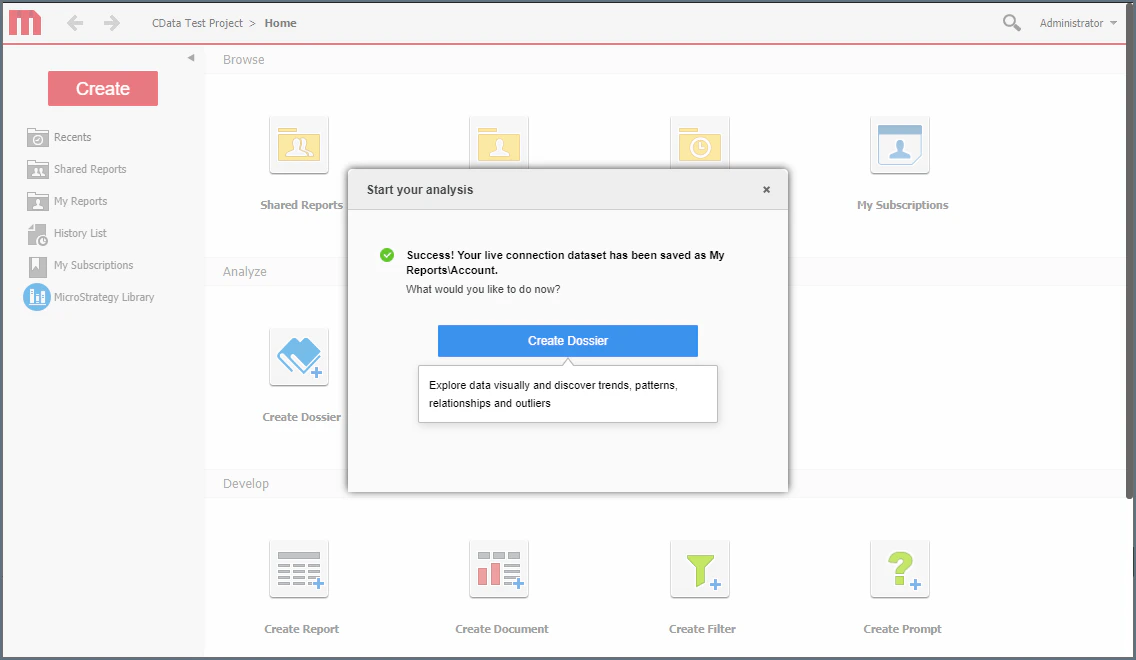 You can now create a new visualization of your connected data.
## Prerequisites for Connecting via OData Endpoint
Before you connect to Connect AI via the OData endpoint, you must first do the following:
* Connect a data source to your Connect AI account. See [Sources](/en/Sources) for more information.
* Create a [Workspace](/en/Workspaces). Later, you will use the **OData Service URL** on that page (*[https://cloud.cdata.com/api/odata/\{workspace\\\_name}](https://cloud.cdata.com/api/odata/\{workspace\\_name})*) with the relevant workspace name to establish the connection.
* Generate a Personal Access Token (PAT) on the [Settings](/en/Settings#personal-access-tokens) page. Copy this down, as it acts as your password during authentication.
## Connect to Connect AI via OData Endpoint
To connect to Connect AI using the OData protocol, follow these steps.
Log in to MicroStrategy.
Click **Add Data**.
In **Data Sources**, select **Data from URL**.
You can now create a new visualization of your connected data.
## Prerequisites for Connecting via OData Endpoint
Before you connect to Connect AI via the OData endpoint, you must first do the following:
* Connect a data source to your Connect AI account. See [Sources](/en/Sources) for more information.
* Create a [Workspace](/en/Workspaces). Later, you will use the **OData Service URL** on that page (*[https://cloud.cdata.com/api/odata/\{workspace\\\_name}](https://cloud.cdata.com/api/odata/\{workspace\\_name})*) with the relevant workspace name to establish the connection.
* Generate a Personal Access Token (PAT) on the [Settings](/en/Settings#personal-access-tokens) page. Copy this down, as it acts as your password during authentication.
## Connect to Connect AI via OData Endpoint
To connect to Connect AI using the OData protocol, follow these steps.
Log in to MicroStrategy.
Click **Add Data**.
In **Data Sources**, select **Data from URL**.
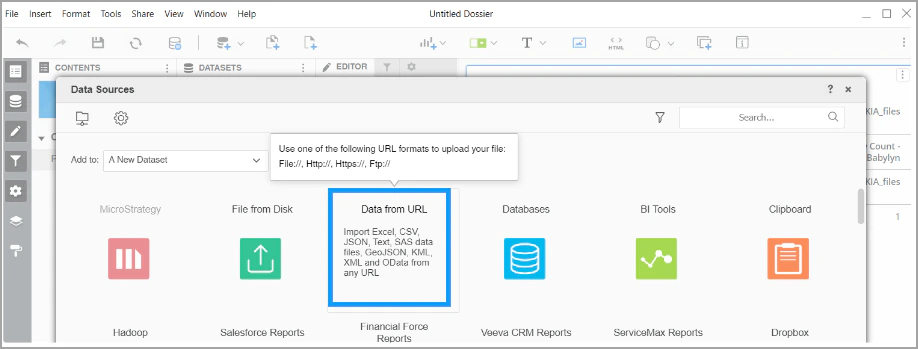 In the **Data from URL** dialog, set the connection properties.
* In the text box, paste the **OData URL** copied from the **Endpoints** dialog of your workspace. The URL is in the following format: *[https://cloud.cdata.com/api/odata/\{workspace\\\_name}](https://cloud.cdata.com/api/odata/\{workspace\\_name})*.
* Select **OData** from the drop-down list.
In the **Data from URL** dialog, set the connection properties.
* In the text box, paste the **OData URL** copied from the **Endpoints** dialog of your workspace. The URL is in the following format: *[https://cloud.cdata.com/api/odata/\{workspace\\\_name}](https://cloud.cdata.com/api/odata/\{workspace\\_name})*.
* Select **OData** from the drop-down list.
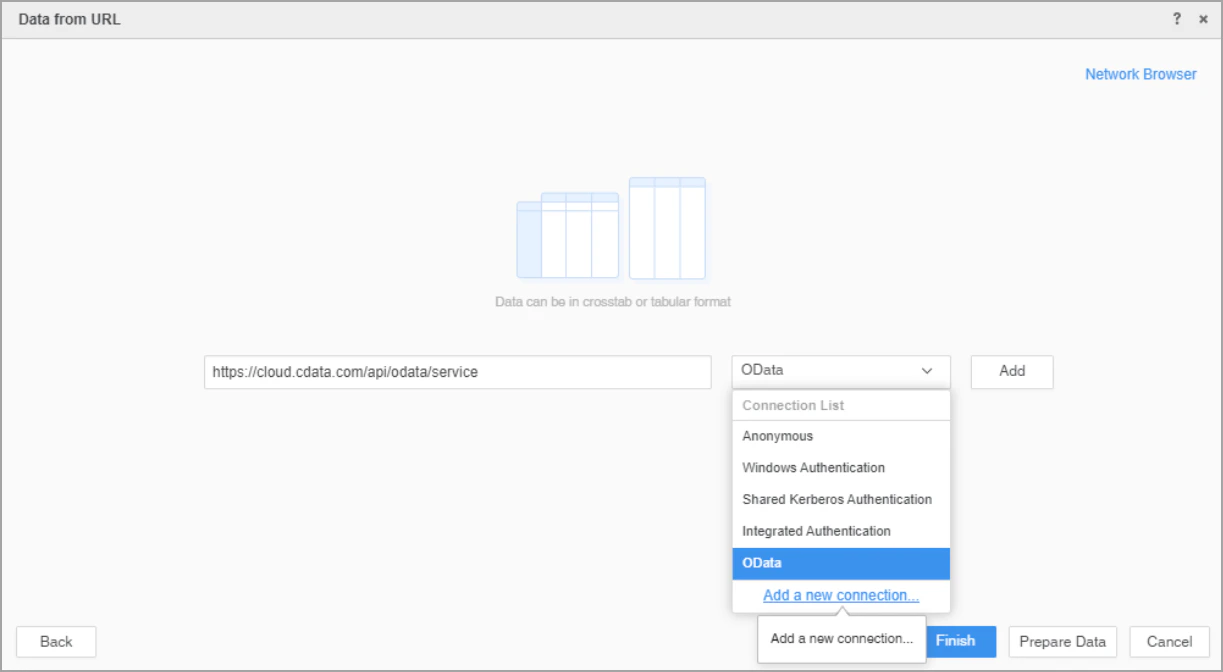 Click **Add** to add the new connector.
Click **Prepare Data** to see a preview of your data.
Click **Add** to add the new connector.
Click **Prepare Data** to see a preview of your data.
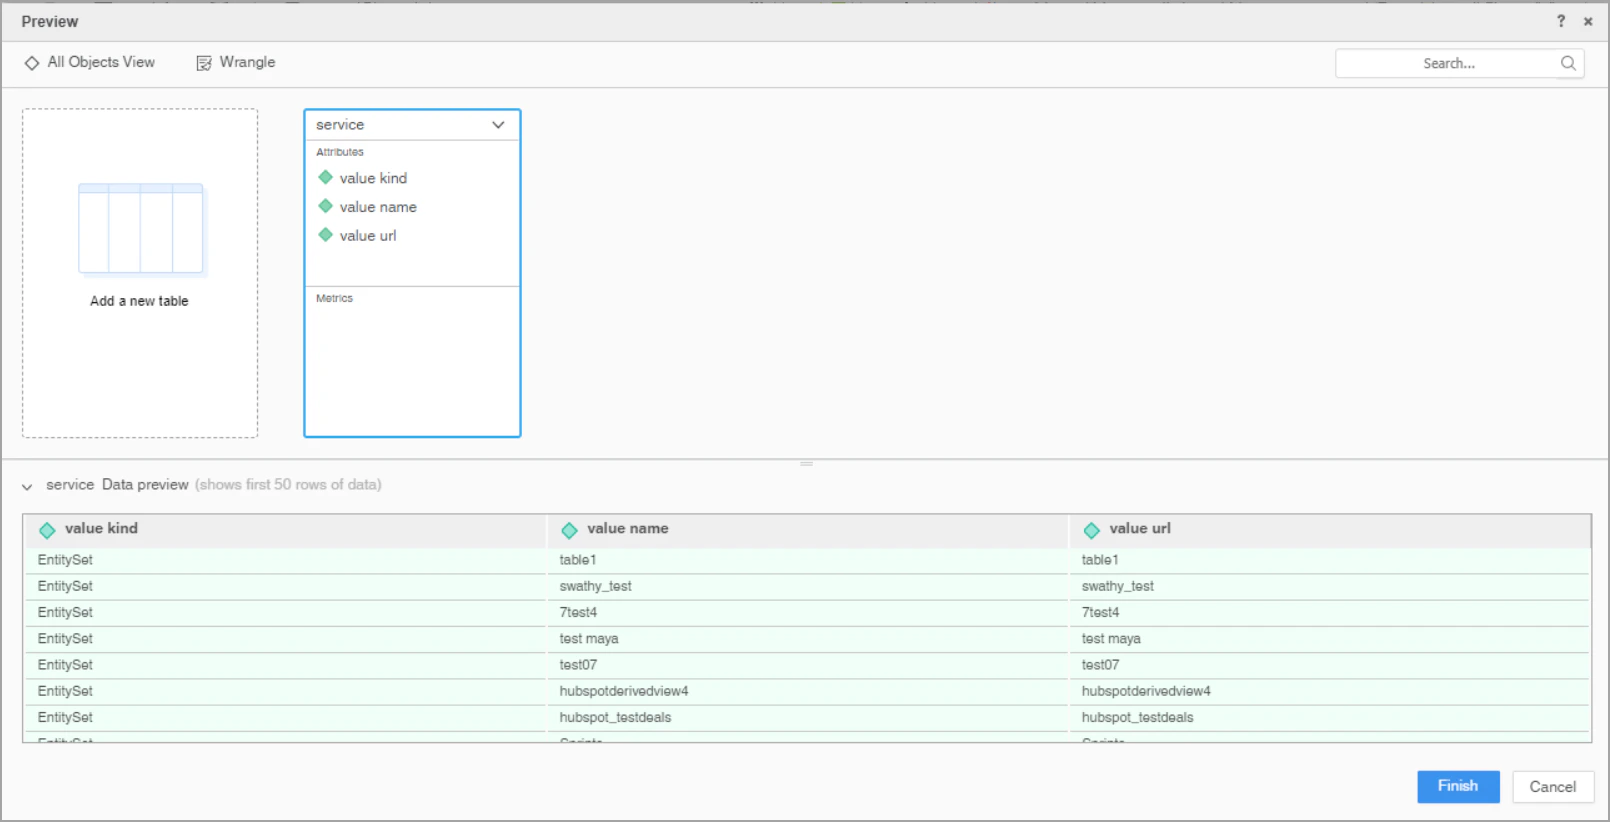 Click **Finish** when you are done adding your connector(s).
You can now create a new visualization of your connected data.
Click **Finish** when you are done adding your connector(s).
You can now create a new visualization of your connected data.