> ## Documentation Index
> Fetch the complete documentation index at: https://docs.cloud.cdata.com/llms.txt
> Use this file to discover all available pages before exploring further.
# Excel
> This page outlines the steps to install and configure the CData Connect Spreadsheets add-in for Excel, including Excel desktop and Excel for the web. After installation, Excel is able to pull data from sources that you have connected to your CData Connect Spreadsheets account.
## Prerequisites
Before you can configure and use Excel with CData Connect Spreadsheets, you must first connect a data source to your CData Connect Spreadsheets account. See [Set Up Connection](#set-up-connection) for more information.
**Connect AI customers only:** You can also import Workspaces and Derived Views. To create a workspace, follow the instructions in [Workspaces](/en/Workspaces#add-a-workspace). To create a derived view (administrators only), follow the instructions in [Creating a Derived View](/en/Data-Explorer#create-a-derived-view).
## Install the Add-In
You can install the Excel add-in from the [CData Connect Spreadsheets dashboard](#from-the-cdata-connect-spreadsheets-dashboard) or from [Excel](#from-microsoft-excel).
### From the CData Connect Spreadsheets Dashboard
Open the **Integrations** page of the dashboard.
Locate the **Excel** tile or use the search bar.
Click **Get Started**. The Excel add-in page opens.
Click **Get it now**. If you are prompted, sign into your Microsoft account.
On the **Launch** page, click **try using Office Online** (for Excel for the web).
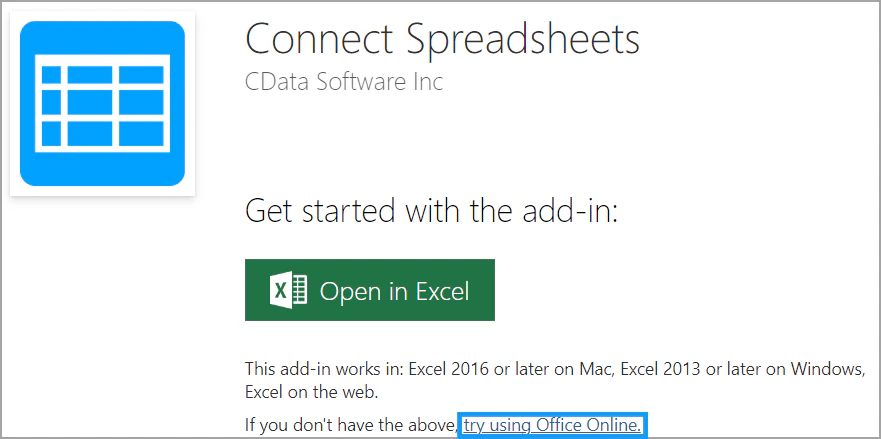 Then, click **Open in Excel Online**.
If you are using Excel desktop, click **Open in Excel**.
Then, click **Open in Excel Online**.
If you are using Excel desktop, click **Open in Excel**.
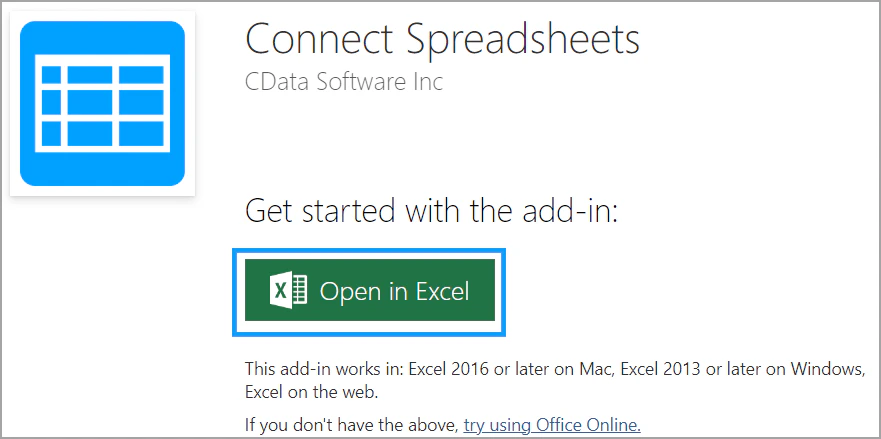 Authorize the add-in if you are prompted to do so.
In either version of Excel, open a workbook or create a new workbook.
Click **Add-ins** on the **Home** tab of the navigation ribbon. The **My Add-ins** window opens.
Authorize the add-in if you are prompted to do so.
In either version of Excel, open a workbook or create a new workbook.
Click **Add-ins** on the **Home** tab of the navigation ribbon. The **My Add-ins** window opens.
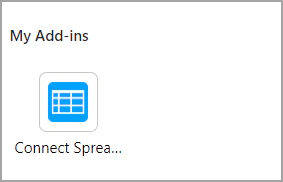 Continue to the steps in [Connect to CData Connect Spreadsheets](#connect-to-cdata-connect-spreadsheets).
### From Microsoft Excel
Open Microsoft Excel (desktop or web) to a new or existing workbook.
Click the **File** tab on the navigation ribbon.
Click **Get Add-ins**. In the list of add-ins that appear, click **More Add-ins**.
Search for *CData* in the window. In the search results, click **Add** next to **CData Connect Spreadsheets**.
Continue to the steps in [Connect to CData Connect Spreadsheets](#connect-to-cdata-connect-spreadsheets).
### From Microsoft Excel
Open Microsoft Excel (desktop or web) to a new or existing workbook.
Click the **File** tab on the navigation ribbon.
Click **Get Add-ins**. In the list of add-ins that appear, click **More Add-ins**.
Search for *CData* in the window. In the search results, click **Add** next to **CData Connect Spreadsheets**.
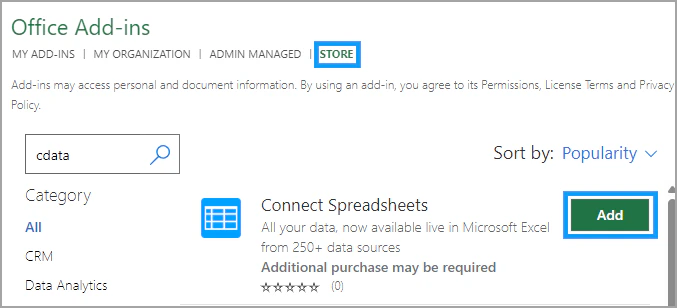 Click **Continue** to agree to the license terms. An authorization dialog opens in your Excel workbook.
Click **Authorize**.
Enter your credentials and click **Continue** in the dialog.
Continue to the steps in [Connect to CData Connect Spreadsheets](#connect-to-cdata-connect-spreadsheets).
## Connect to CData Connect Spreadsheets
After you install the Excel add-in, follow these steps to connect to your CData Connect Spreadsheets account:
Open the **Data** tab on the Excel navigation ribbon and click **CData Connect Spreadsheets**.
Click **Continue** to agree to the license terms. An authorization dialog opens in your Excel workbook.
Click **Authorize**.
Enter your credentials and click **Continue** in the dialog.
Continue to the steps in [Connect to CData Connect Spreadsheets](#connect-to-cdata-connect-spreadsheets).
## Connect to CData Connect Spreadsheets
After you install the Excel add-in, follow these steps to connect to your CData Connect Spreadsheets account:
Open the **Data** tab on the Excel navigation ribbon and click **CData Connect Spreadsheets**.
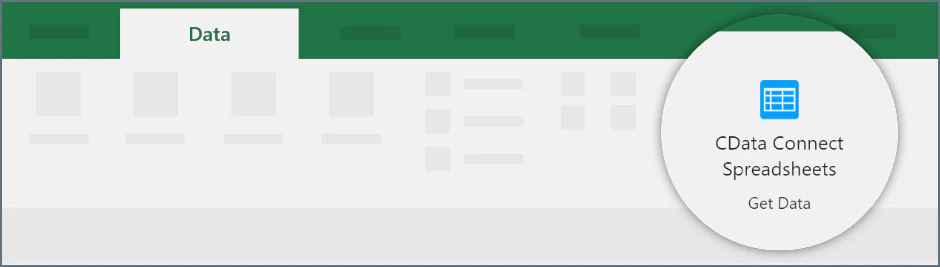 Authorize the CData Connect Spreadsheets add-in.
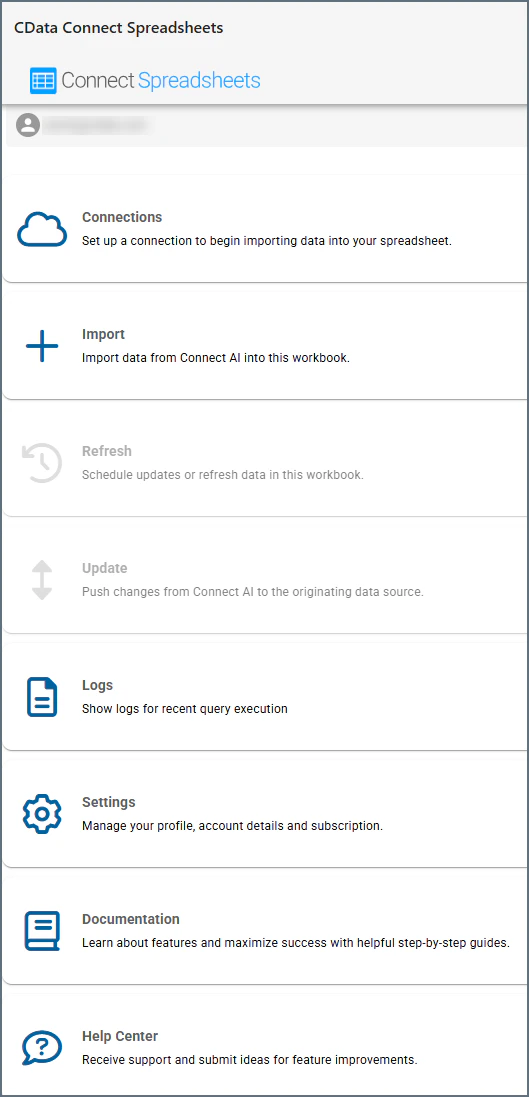
The CData add-in pane appears to the right of your Excel workbook.
Authorize the CData Connect Spreadsheets add-in.
The CData add-in pane appears to the right of your Excel workbook.
 ## Set Up Connection
If you do not yet have the data connection you need for CData Connect Spreadsheets, you need to set one up.
In the add-in pane, click **Connections**. Click **Add Connection**.
Select the connector for the data you want to connect to Excel.
Enter your data connection settings. Save and test your connection.
After you have a successful connection, you can [Import Data](#import-data).
You can also use the **Connections** option to edit existing connections.
## Import Data
To import data from CData Connect Spreadsheets to Excel, follow these steps:
Click **Import**.
Select an option from the drop down menu: **Connections**, **Workspaces**, or **Derived Views**. Then follow the directions for the option you selected.
Only Connect AI customers can access workspaces and derived views.
### Import Connections
Select a connection from the drop-down list.
Select either **Query Builder** to build the query in steps or **Custom SQL** to enter a query manually.
* For Query Builder, select a schema (if there are multiple schemas), table, and columns. You can search by column name. If desired, you can also set [filters](#filters), [sorting options](#sorting), and limits. View the generated query and adjust if necessary.
* For Custom SQL, enter the SQL Statement in the provided field.
## Set Up Connection
If you do not yet have the data connection you need for CData Connect Spreadsheets, you need to set one up.
In the add-in pane, click **Connections**. Click **Add Connection**.
Select the connector for the data you want to connect to Excel.
Enter your data connection settings. Save and test your connection.
After you have a successful connection, you can [Import Data](#import-data).
You can also use the **Connections** option to edit existing connections.
## Import Data
To import data from CData Connect Spreadsheets to Excel, follow these steps:
Click **Import**.
Select an option from the drop down menu: **Connections**, **Workspaces**, or **Derived Views**. Then follow the directions for the option you selected.
Only Connect AI customers can access workspaces and derived views.
### Import Connections
Select a connection from the drop-down list.
Select either **Query Builder** to build the query in steps or **Custom SQL** to enter a query manually.
* For Query Builder, select a schema (if there are multiple schemas), table, and columns. You can search by column name. If desired, you can also set [filters](#filters), [sorting options](#sorting), and limits. View the generated query and adjust if necessary.
* For Custom SQL, enter the SQL Statement in the provided field.
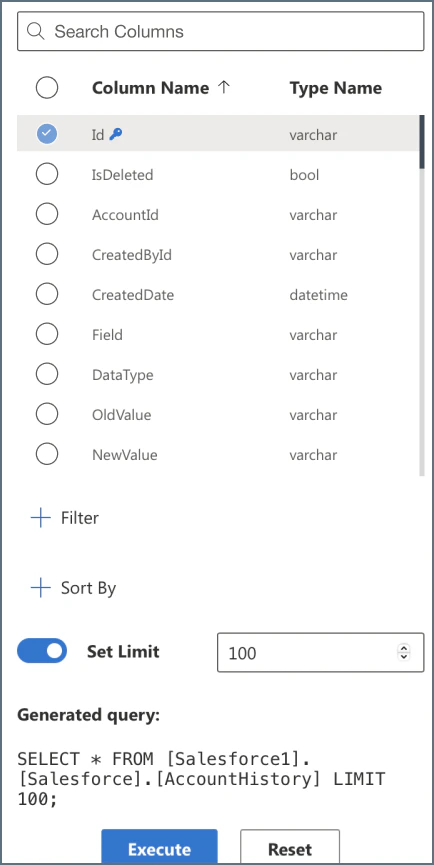 Click **Execute**.
When prompted, choose to output the data in either the current spreadsheet or a new one.
### Import Workspaces (Connect AI Customers Only)
Select a workspace from the drop-down list.
Select **Query Builder** to build the query in steps or select **Custom SQL** to enter a query manually.
* For Query Builder, select a workspace and the columns to display. You can search by column name. If desired, you can also set [filters](#filters), [sorting options](#sorting), and limits. View the generated query and adjust if necessary.
* For Custom SQL, enter the SQL Statement in the provided field.
Click **Execute**.
When prompted, choose to output the data in either the current spreadsheet or a new one.
### Import Derived Views (Connect AI Customers Only)
Select **Query Builder** to build the query in steps or select **Custom SQL** to enter a query manually.
* For Query Builder, select a workspace and the columns to display. You can search by column name. If desired, you can also set [filters](#filters), [sorting options](#sorting), and limits. View the generated query and adjust if necessary.
* For Custom SQL, enter the SQL Statement in the provided field.
Click **Execute**.
When prompted, choose to output the data in either the current spreadsheet or a new one.
## Refresh Data
Once your data is imported, you can set it to periodically refresh automatically. You can also perform a manual refresh of your spreadsheet data. The automatic refresh overwrites any uncommitted data. If you are only reading data, the automatic update is not an issue. If you have enabled auto refresh and are writing data, commit your changes often with the **Update** button.
You must have the Excel workbook open in the browser in order for the automatic refresh to work properly. In addition, the automatic refresh will not execute if the workbook is idle for over 15 minutes.
On the **CData Connect Spreadsheets** screen, select **Refresh**.
Select the data sheet or sheets to refresh.
Click **Execute**.
When prompted, choose to output the data in either the current spreadsheet or a new one.
### Import Workspaces (Connect AI Customers Only)
Select a workspace from the drop-down list.
Select **Query Builder** to build the query in steps or select **Custom SQL** to enter a query manually.
* For Query Builder, select a workspace and the columns to display. You can search by column name. If desired, you can also set [filters](#filters), [sorting options](#sorting), and limits. View the generated query and adjust if necessary.
* For Custom SQL, enter the SQL Statement in the provided field.
Click **Execute**.
When prompted, choose to output the data in either the current spreadsheet or a new one.
### Import Derived Views (Connect AI Customers Only)
Select **Query Builder** to build the query in steps or select **Custom SQL** to enter a query manually.
* For Query Builder, select a workspace and the columns to display. You can search by column name. If desired, you can also set [filters](#filters), [sorting options](#sorting), and limits. View the generated query and adjust if necessary.
* For Custom SQL, enter the SQL Statement in the provided field.
Click **Execute**.
When prompted, choose to output the data in either the current spreadsheet or a new one.
## Refresh Data
Once your data is imported, you can set it to periodically refresh automatically. You can also perform a manual refresh of your spreadsheet data. The automatic refresh overwrites any uncommitted data. If you are only reading data, the automatic update is not an issue. If you have enabled auto refresh and are writing data, commit your changes often with the **Update** button.
You must have the Excel workbook open in the browser in order for the automatic refresh to work properly. In addition, the automatic refresh will not execute if the workbook is idle for over 15 minutes.
On the **CData Connect Spreadsheets** screen, select **Refresh**.
Select the data sheet or sheets to refresh.
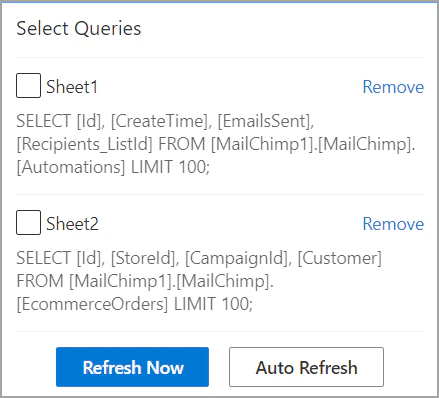 To manually refresh, click **Refresh Now**. To set up automatic updates, click **Auto Refresh**.
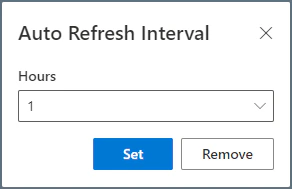 Note that the refresh interval is set in hours, and one hour is the minimum interval between refreshes. If the auto-refresh fails, the Excel add-in will attempt the auto-refresh two more times. After the third fail, the next auto-refresh attempt will occur at the next user set interval.
You can also remove a query or queries from the refresh list by selecting the query and clicking **Remove**.
## Update Data
You can push changes from the Excel spreadsheet to the originating data source. Note that in order to update a spreadsheet, the data must contain at least one primary key. You must also have the proper permissions to update the source data.
Be sure to update your data frequently if you are using the auto refresh feature, or your changes may be overwritten.
CData Connect Spreadsheets does not support updates for views (only tables).
To update data in your spreadsheet, follow these steps:
Make your changes to the Excel spreadsheet.
On the **CData Connect Spreadsheets** add-in pane, click **Update**. You can choose to update the entire spreadsheet or just the selected rows. Click **Confirm**.
## Delete Data
CData Connect Spreadsheets does not support deletion for views (only tables).
To delete rows from a spreadsheet, follow these steps:
If necessary, return to the main menu of the CData Connect Spreadsheets add-in.
Select the record(s) to delete.
On the **CData Connect Spreadsheets** add-in pane, click **Delete**. Click **Confirm**.
## Logs
Click **Logs** to open a dialog that lists the most recent queries, including:
* The time and date they occurred
* Their results (success or failure)
* The contents and parameters of the queries
See [Logs](/en/Logs) for more information.
## Settings
Click [**Settings**](/en/Settings) to view and manage your profile, account details, and subscription.
## Advanced Query Settings
When importing data, you can use [Filters](#filters) and [Sorting](#sorting) to build your query. For SQL queries, you can use the advanced options [Parameterized Queries](#write-parameterized-queries) and [Searchable Spreadsheets](#create-searchable-spreadsheets).
### Filters
To add a filter, click the **+** next to the **Filters** header. You can add more filters by clicking the **+** again, and you can delete a filter by clicking the trash can icon next to it.
Note that the refresh interval is set in hours, and one hour is the minimum interval between refreshes. If the auto-refresh fails, the Excel add-in will attempt the auto-refresh two more times. After the third fail, the next auto-refresh attempt will occur at the next user set interval.
You can also remove a query or queries from the refresh list by selecting the query and clicking **Remove**.
## Update Data
You can push changes from the Excel spreadsheet to the originating data source. Note that in order to update a spreadsheet, the data must contain at least one primary key. You must also have the proper permissions to update the source data.
Be sure to update your data frequently if you are using the auto refresh feature, or your changes may be overwritten.
CData Connect Spreadsheets does not support updates for views (only tables).
To update data in your spreadsheet, follow these steps:
Make your changes to the Excel spreadsheet.
On the **CData Connect Spreadsheets** add-in pane, click **Update**. You can choose to update the entire spreadsheet or just the selected rows. Click **Confirm**.
## Delete Data
CData Connect Spreadsheets does not support deletion for views (only tables).
To delete rows from a spreadsheet, follow these steps:
If necessary, return to the main menu of the CData Connect Spreadsheets add-in.
Select the record(s) to delete.
On the **CData Connect Spreadsheets** add-in pane, click **Delete**. Click **Confirm**.
## Logs
Click **Logs** to open a dialog that lists the most recent queries, including:
* The time and date they occurred
* Their results (success or failure)
* The contents and parameters of the queries
See [Logs](/en/Logs) for more information.
## Settings
Click [**Settings**](/en/Settings) to view and manage your profile, account details, and subscription.
## Advanced Query Settings
When importing data, you can use [Filters](#filters) and [Sorting](#sorting) to build your query. For SQL queries, you can use the advanced options [Parameterized Queries](#write-parameterized-queries) and [Searchable Spreadsheets](#create-searchable-spreadsheets).
### Filters
To add a filter, click the **+** next to the **Filters** header. You can add more filters by clicking the **+** again, and you can delete a filter by clicking the trash can icon next to it.
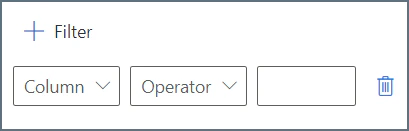 Each filter has three fields to fill out:
* **Column**—select the column from your table that you want to filter.
* **Operator**—the operation the filter performs. Options are *equals*, *does not equal*, *contains*, *does not contain*, *less than*, *less than or equal to*, *greater than*, and *greater than or equal to*.
* **Value**—the value for the filter operation.
For example, if you wanted to retrieve AccountValues above \$100,000, you might set the Column to *AccountValues*, the Operator to *greater than*, and the Value to *100,000*. Then, when you execute the query, only results matching this filter will be returned.
As you enter your filter parameters, the **Generated Query** at the bottom of the pane automatically updates.
### Sorting
To add a sorting rule to your query results, click the **+** next to the **Sort By** header. You can add more sorting rules by clicking the **+** again, and you can delete a sorting rule by clicking the trash can icon next to it.
Each filter has three fields to fill out:
* **Column**—select the column from your table that you want to filter.
* **Operator**—the operation the filter performs. Options are *equals*, *does not equal*, *contains*, *does not contain*, *less than*, *less than or equal to*, *greater than*, and *greater than or equal to*.
* **Value**—the value for the filter operation.
For example, if you wanted to retrieve AccountValues above \$100,000, you might set the Column to *AccountValues*, the Operator to *greater than*, and the Value to *100,000*. Then, when you execute the query, only results matching this filter will be returned.
As you enter your filter parameters, the **Generated Query** at the bottom of the pane automatically updates.
### Sorting
To add a sorting rule to your query results, click the **+** next to the **Sort By** header. You can add more sorting rules by clicking the **+** again, and you can delete a sorting rule by clicking the trash can icon next to it.
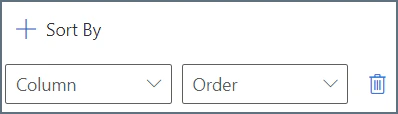 Each sorting rule requires a **Column** and a sorting **Order** (ascending or descending). If you add multiple sorting rules, the results are sorted in the order that the rules appear. The query gives highest sorting priority to the first rule, then the second rule, etc.
As you enter your sorting parameters, the **Generated Query** at the bottom of the pane automatically updates.
### Write Parameterized Queries
You can create dynamic spreadsheets by referencing cells in your custom SQL statement. The Excel add-in executes the statement as a parameterized query. As you change the values in the sheet, the Excel add-in executes a new query.
### Create Searchable Spreadsheets
Use a parameterized SELECT WHERE query to create a spreadsheet that dynamically filters the data as you edit cells. The following filter criteria references the `@InputSheet!A2` parameter, which is cell `A2` of the sheet `InputSheet`. The `@` prefix indicates that `Industry` is a required parameter.
```bash theme={null}
SELECT BillingState, Name FROM Account WHERE Industry = @InputSheet!A2
```
Each sorting rule requires a **Column** and a sorting **Order** (ascending or descending). If you add multiple sorting rules, the results are sorted in the order that the rules appear. The query gives highest sorting priority to the first rule, then the second rule, etc.
As you enter your sorting parameters, the **Generated Query** at the bottom of the pane automatically updates.
### Write Parameterized Queries
You can create dynamic spreadsheets by referencing cells in your custom SQL statement. The Excel add-in executes the statement as a parameterized query. As you change the values in the sheet, the Excel add-in executes a new query.
### Create Searchable Spreadsheets
Use a parameterized SELECT WHERE query to create a spreadsheet that dynamically filters the data as you edit cells. The following filter criteria references the `@InputSheet!A2` parameter, which is cell `A2` of the sheet `InputSheet`. The `@` prefix indicates that `Industry` is a required parameter.
```bash theme={null}
SELECT BillingState, Name FROM Account WHERE Industry = @InputSheet!A2
```