> ## Documentation Index
> Fetch the complete documentation index at: https://docs.cloud.cdata.com/llms.txt
> Use this file to discover all available pages before exploring further.
# Cursor
> Cursor is an AI-powered integrated development environment (IDE) developed by Anysphere. It is a fork of Visual Studio Code.
Connect AI uses OAuth authentication by default, but you can also use Basic authentication with a Personal Access Token (PAT).
## Prerequisites
Before you can configure and use Cursor with Connect AI, you must first do the following:
* Install the Cursor IDE.
* Connect a data source to your Connect AI account. See [Sources](/en/Sources) for more information.
* (Basic authentication only) Generate a Personal Access Token (PAT) on the [Settings](/en/Settings#personal-access-tokens) page. Copy this down, as it acts as your password during authentication.
* (Basic authentication only) Base64-encode your Connect AI credentials in the following format: `Base64("email:PAT")`.
## Connect to Connect AI
### OAuth Authentication
In the Cursor IDE, go to **Cursor Settings**. Then click **Tools & MCP**, and then click **New MCP Server.** The file `mcp.json` opens automatically in the Cursor IDE.
Copy and paste the following into the `mcp.json` file.
```json theme={null}
{
"mcpServers": {
"cdata-mcp": {
"url": "https://mcp.cloud.cdata.com/mcp"
}
}
}
```
Return to **Tools & MCP** under **Cursor Settings**. Cursor detects that the server requires OAuth and prompts you to log in. Cursor opens your browser to the Connect AI sign-in page. Complete the sign-in to authorize the connection.
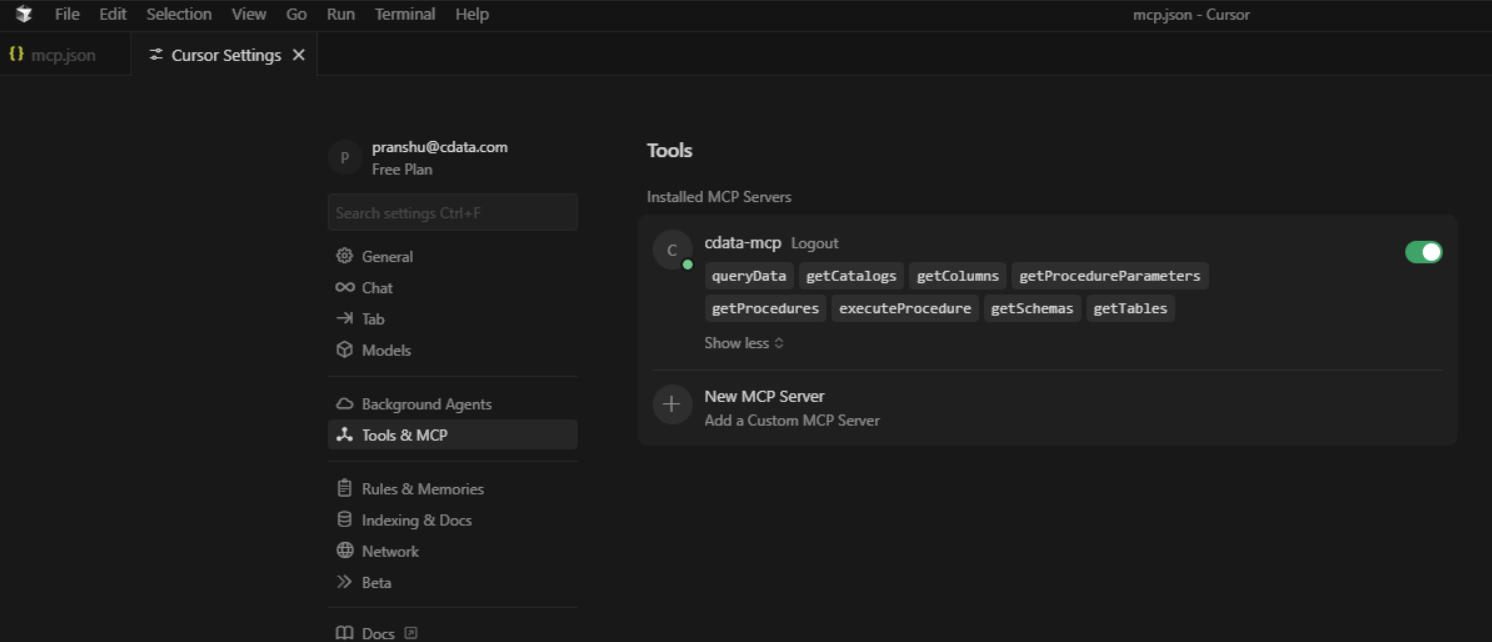
Confirm that Cursor is connected to CData's MCP Server. You should see **cdata-mcp** listed with a green indicator.
 ### Basic Authentication
In the Cursor IDE, go to **Cursor Settings**. Then click **Tools & MCP**, and then click **New MCP Server.** The file `mcp.json` opens automatically in the Cursor IDE.
Copy and paste the following into the `mcp.json` file. Replace the authorization header with the Base64-encoded credentials obtained in the prerequisites.
```json theme={null}
{
"mcpServers": {
"cdata-mcp": {
"url": "https://mcp.cloud.cdata.com/mcp",
"headers": {
"Authorization": "Basic YOUR_BASE64_ENCODED_EMAIL:PAT" //Authorization obtained in prerequisites
}
}
}
}
```
Return to **Tools & MCP** under **Cursor Settings**. Confirm that Cursor is connected to CData's MCP Server. You should see **cdata-mcp** listed with a green indicator.
## Chat with Cursor
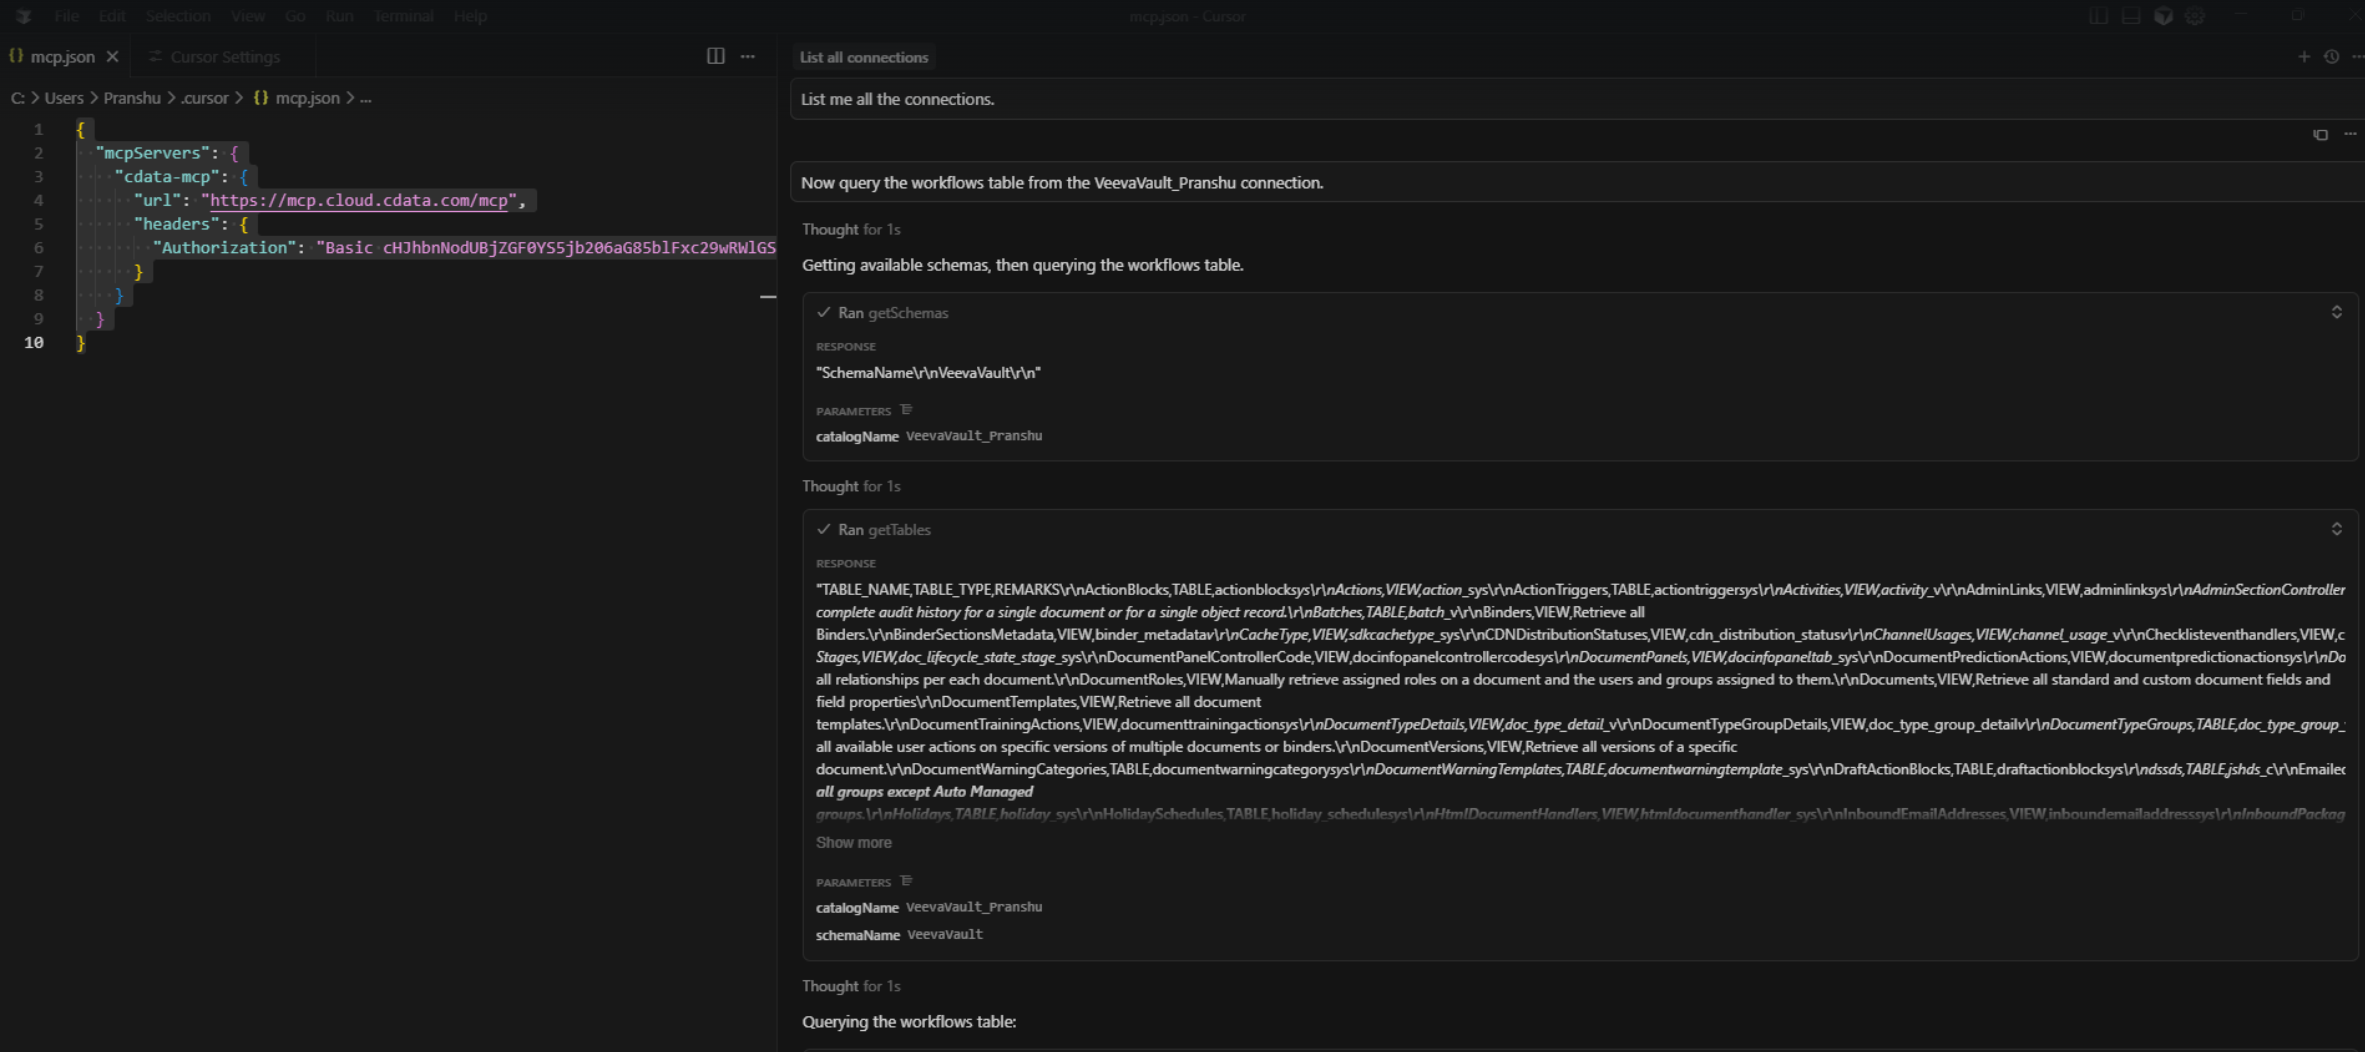
You can now chat with the assistant. Cursor lists the available tools, the connections, and a result set of a given table of a given connection. By default, Cursor asks for confirmation before executing MCP tool actions.
### Basic Authentication
In the Cursor IDE, go to **Cursor Settings**. Then click **Tools & MCP**, and then click **New MCP Server.** The file `mcp.json` opens automatically in the Cursor IDE.
Copy and paste the following into the `mcp.json` file. Replace the authorization header with the Base64-encoded credentials obtained in the prerequisites.
```json theme={null}
{
"mcpServers": {
"cdata-mcp": {
"url": "https://mcp.cloud.cdata.com/mcp",
"headers": {
"Authorization": "Basic YOUR_BASE64_ENCODED_EMAIL:PAT" //Authorization obtained in prerequisites
}
}
}
}
```
Return to **Tools & MCP** under **Cursor Settings**. Confirm that Cursor is connected to CData's MCP Server. You should see **cdata-mcp** listed with a green indicator.
## Chat with Cursor
You can now chat with the assistant. Cursor lists the available tools, the connections, and a result set of a given table of a given connection. By default, Cursor asks for confirmation before executing MCP tool actions.