> ## Documentation Index
> Fetch the complete documentation index at: https://docs.cloud.cdata.com/llms.txt
> Use this file to discover all available pages before exploring further.
# FileMaker Pro
> This page outlines the steps to connect FileMaker Pro to Connect AI.
## Prerequisites
Before you connect, you must first do the following:
* Connect a data source to your Connect AI account. See [Sources](/en/Sources) for more information.
* Generate a Personal Access Token (PAT) on the [Settings](/en/Settings#personal-access-tokens) page. Copy this down, as it acts as your password during authentication.
### Connect from Mac
Download and install the [Actual ODBC Driver for SQL Server](https://actualtech.com/product_sqlserver.php).
Configure a DSN using the Actual ODBC driver by setting the following:
* **URL**: [https://tds.cdata.com/](https://tds.cdata.com/)
* **Port**: Change the port from 1433 to 14333
* **Username**: your Connect AI email
* **Password**: the PAT you created earlier
The FileMaker Pro SQL Query Builder requires customization to connect to Connect AI. Auto-generated queries do not work in FileMaker Pro. We recommend the following additional steps:
In the SQL Query Builder **SELECT** tab, select the columns to include as part of the query.
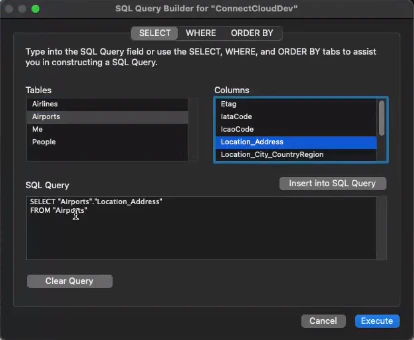 Open the **WHERE** tab of the SQL Query Builder and select **Show only selected columns**.
In **Table.Column**, select a table and a column name.
Set the **Operator** to **=**.
Select **Column**, and then select the same table and column name as **Table.Column**.
Click **Insert into SQL Query**.
Open the **WHERE** tab of the SQL Query Builder and select **Show only selected columns**.
In **Table.Column**, select a table and a column name.
Set the **Operator** to **=**.
Select **Column**, and then select the same table and column name as **Table.Column**.
Click **Insert into SQL Query**.
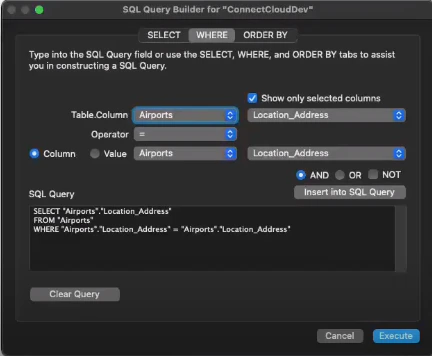 If no other modifications to the SQL query are required, click **Execute**.
### Connect from Windows
To establish a connection from FileMaker Pro to Connect AI, follow these steps.
Download and install the Connect AI ODBC driver.
* Open the **Integrations** page of Connect AI.
* Search for **ODBC**.
* Click **Download** and select your operating system.
* When the download is complete, run the setup file.
* When the installation is complete, the ConfigureODBC file can be found in the installation directory.
Open the ConfigureODBC file.
If no other modifications to the SQL query are required, click **Execute**.
### Connect from Windows
To establish a connection from FileMaker Pro to Connect AI, follow these steps.
Download and install the Connect AI ODBC driver.
* Open the **Integrations** page of Connect AI.
* Search for **ODBC**.
* Click **Download** and select your operating system.
* When the download is complete, run the setup file.
* When the installation is complete, the ConfigureODBC file can be found in the installation directory.
Open the ConfigureODBC file.
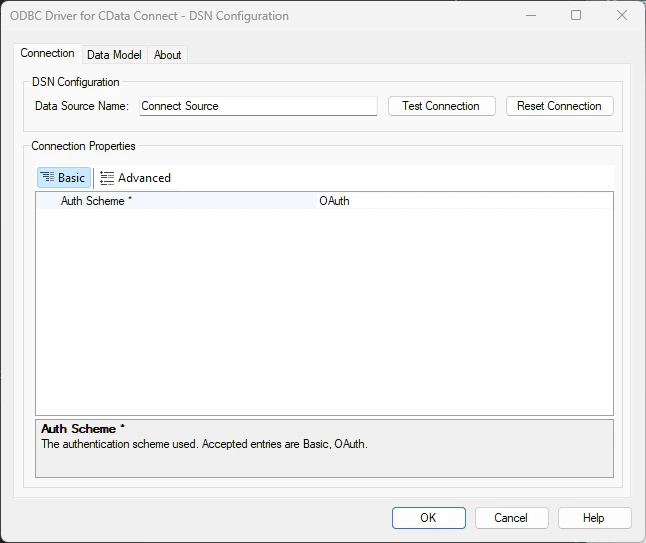 In the **Basic** tab, make sure the **Auth Scheme** is `OAuth`.
In the **Advanced** tab, in **Miscellaneous** > **Default Catalog**, enter the name of the connection set up in the prerequisites.
In the **Basic** tab, make sure the **Auth Scheme** is `OAuth`.
In the **Advanced** tab, in **Miscellaneous** > **Default Catalog**, enter the name of the connection set up in the prerequisites.
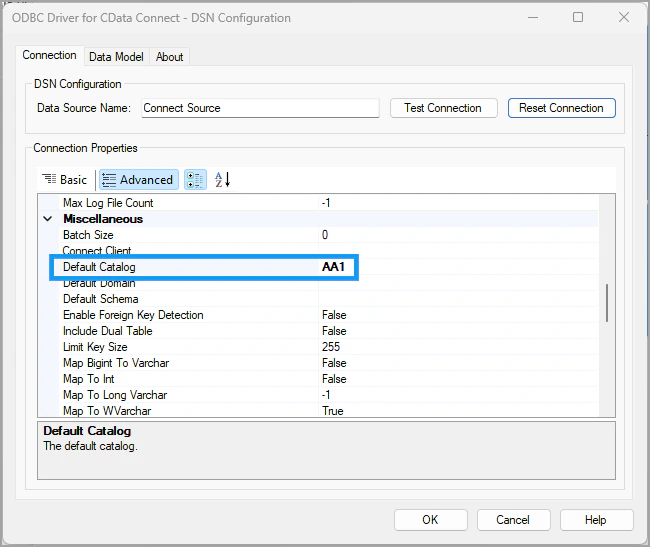 Click **Test Connection**. Click **OK** when you have a successful connection.
Launch FileMaker Pro. A startup screen appears.
Click **Test Connection**. Click **OK** when you have a successful connection.
Launch FileMaker Pro. A startup screen appears.
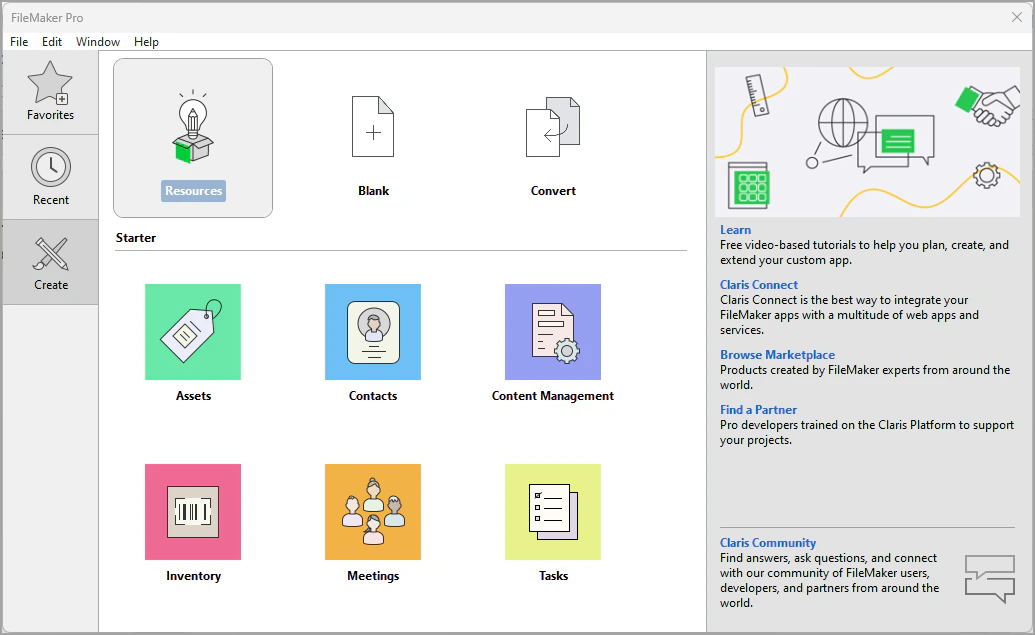 Start a blank app or use a template. Name your app.
Select **File** > **Import Records** > **ODBC Data Source**. A **Select ODBC Data Source** dialog appears.
Start a blank app or use a template. Name your app.
Select **File** > **Import Records** > **ODBC Data Source**. A **Select ODBC Data Source** dialog appears.
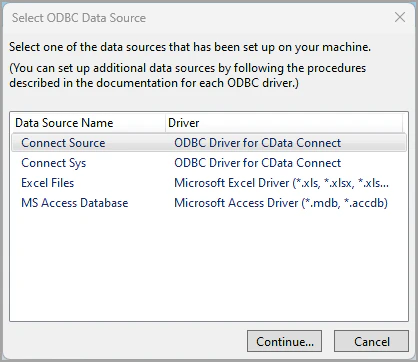 Select **Connect Source** and click **Continue**.
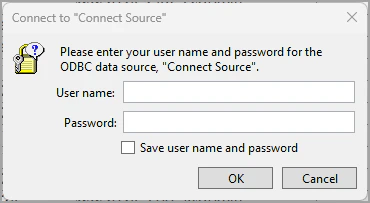 Enter your user credentials in the dialog. The **User name** is your User Id in Connect AI, and the **Password** is the PAT obtained in the prerequisites.
When the Connect AI data is finished importing, a **SQL Query Builder** dialog appears.
Enter your user credentials in the dialog. The **User name** is your User Id in Connect AI, and the **Password** is the PAT obtained in the prerequisites.
When the Connect AI data is finished importing, a **SQL Query Builder** dialog appears.
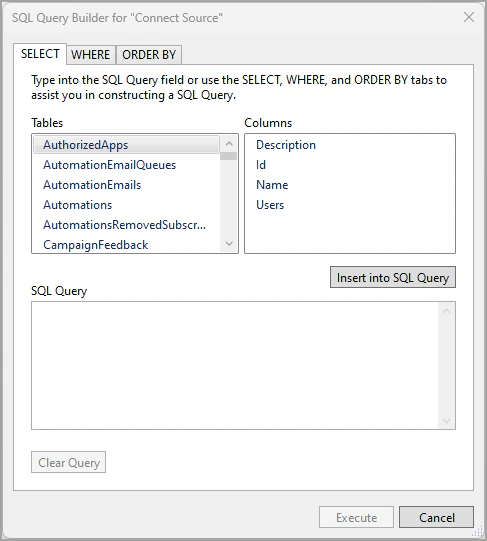 Select the tables and columns to insert into your SQL query and click **Execute**.
A **Specify Import Order** dialog appears, where you can customize how and into which table you want to import the Connect AI data into FileMaker Pro.
Select the tables and columns to insert into your SQL query and click **Execute**.
A **Specify Import Order** dialog appears, where you can customize how and into which table you want to import the Connect AI data into FileMaker Pro.
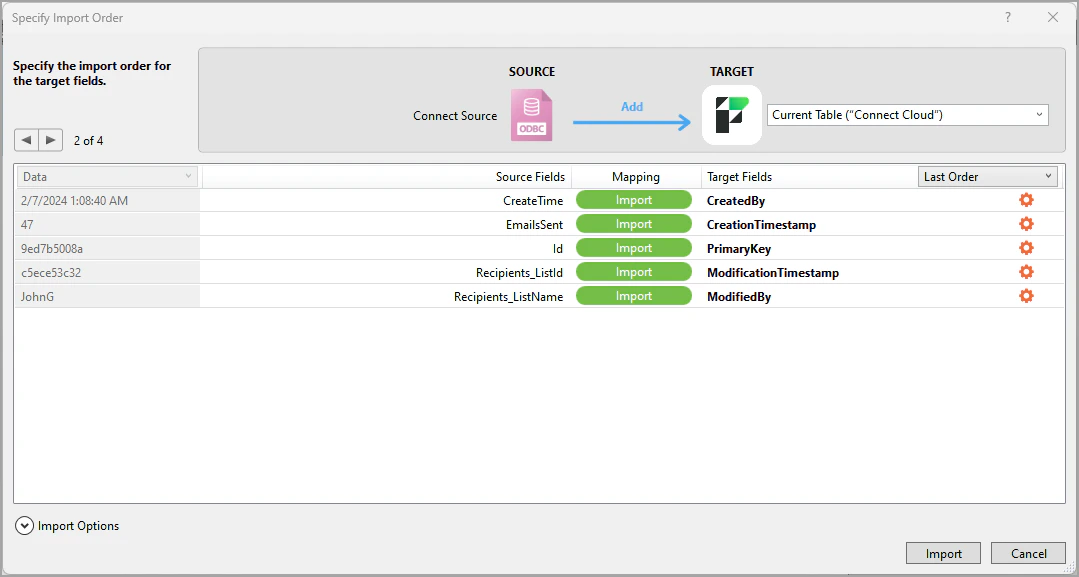 Click **Import** to import the data into the target FileMaker Pro file.
You can now work with the data in FileMaker Pro.
Click **Import** to import the data into the target FileMaker Pro file.
You can now work with the data in FileMaker Pro.