> ## Documentation Index
> Fetch the complete documentation index at: https://docs.cloud.cdata.com/llms.txt
> Use this file to discover all available pages before exploring further.
# Choreo
> This page outlines the steps to connect Choreo to your Connect AI account.
## Prerequisites
Before you connect, you must first do the following:
* Connect a data source to your Connect AI account. See [Sources](/en/Sources) for more information.
* Generate a Personal Access Token (PAT) on the [Settings](/en/Settings#personal-access-tokens) page. Copy this down, as it acts as your password during authentication.
## Connect to Connect AI in Choreo
Sign in to the [Choreo platform](https://console.choreo.dev/).
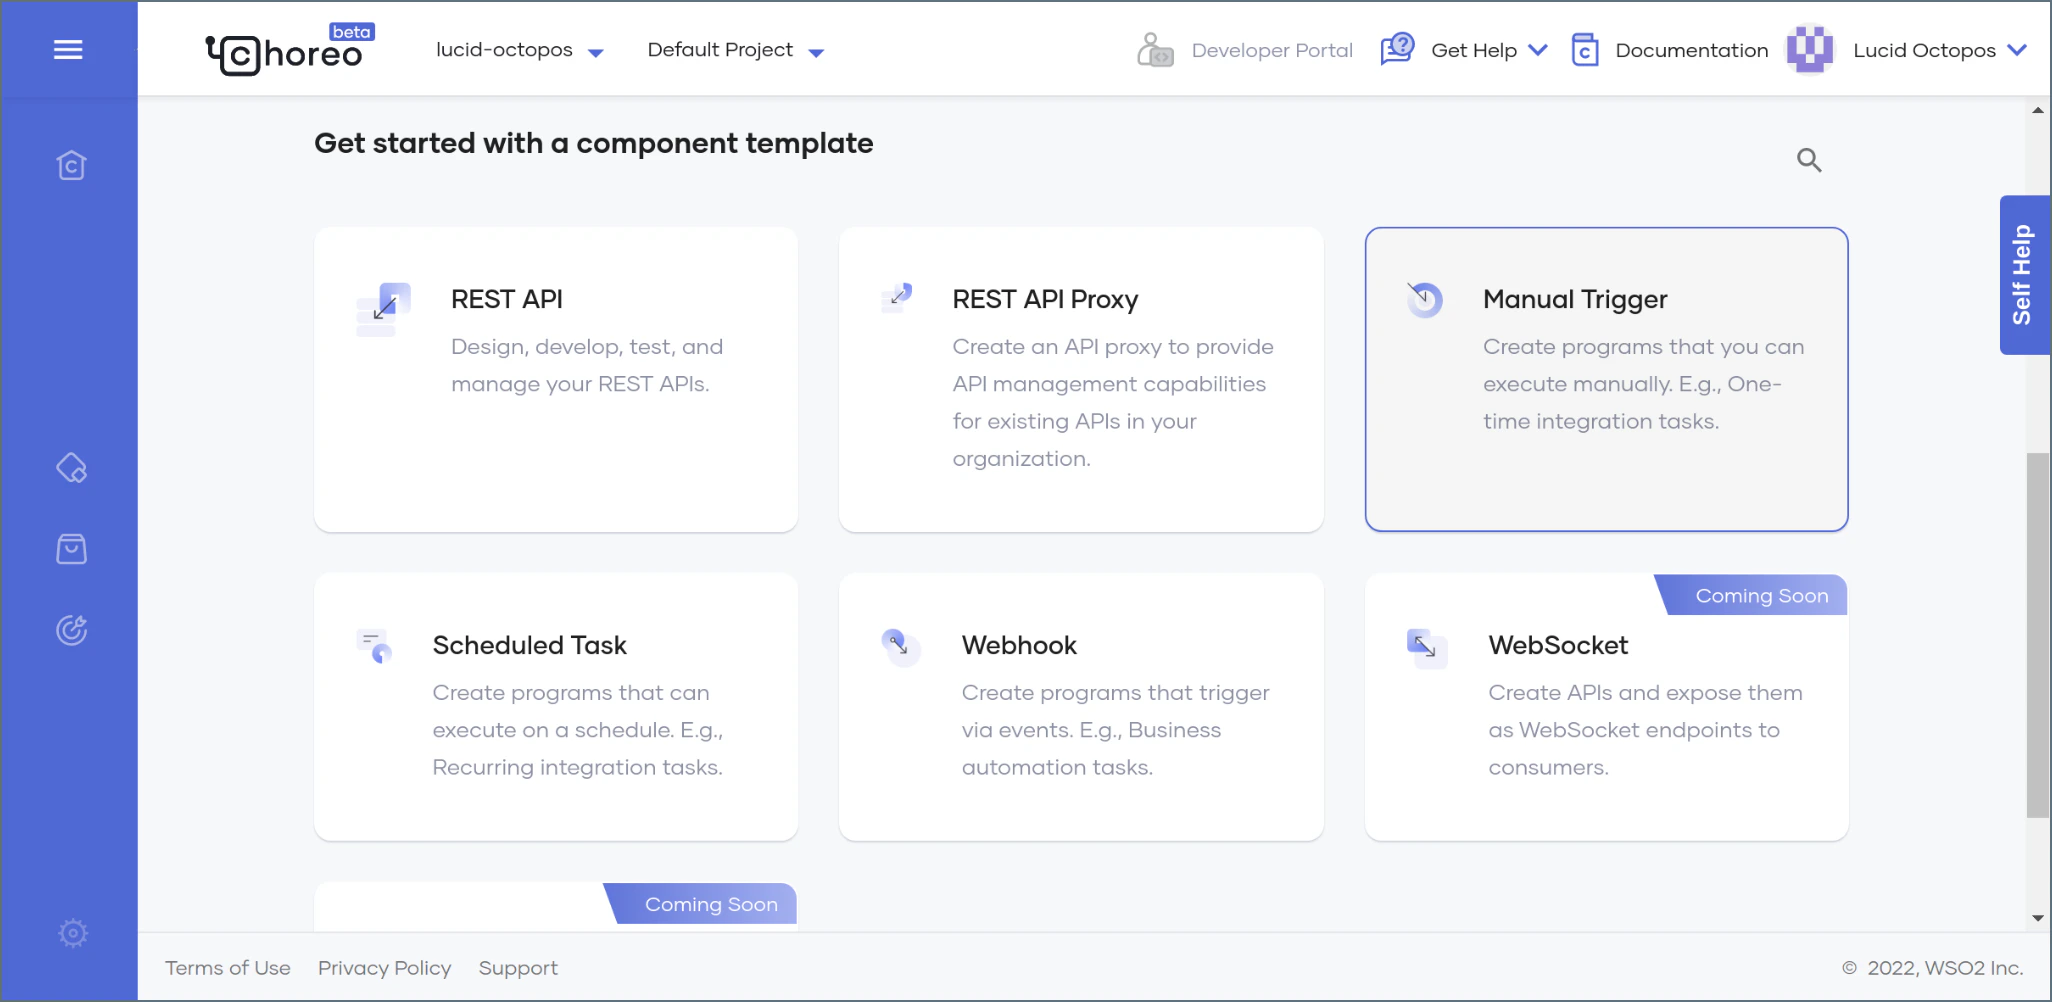
Click **Manual Trigger** to create a program that you can execute manually.
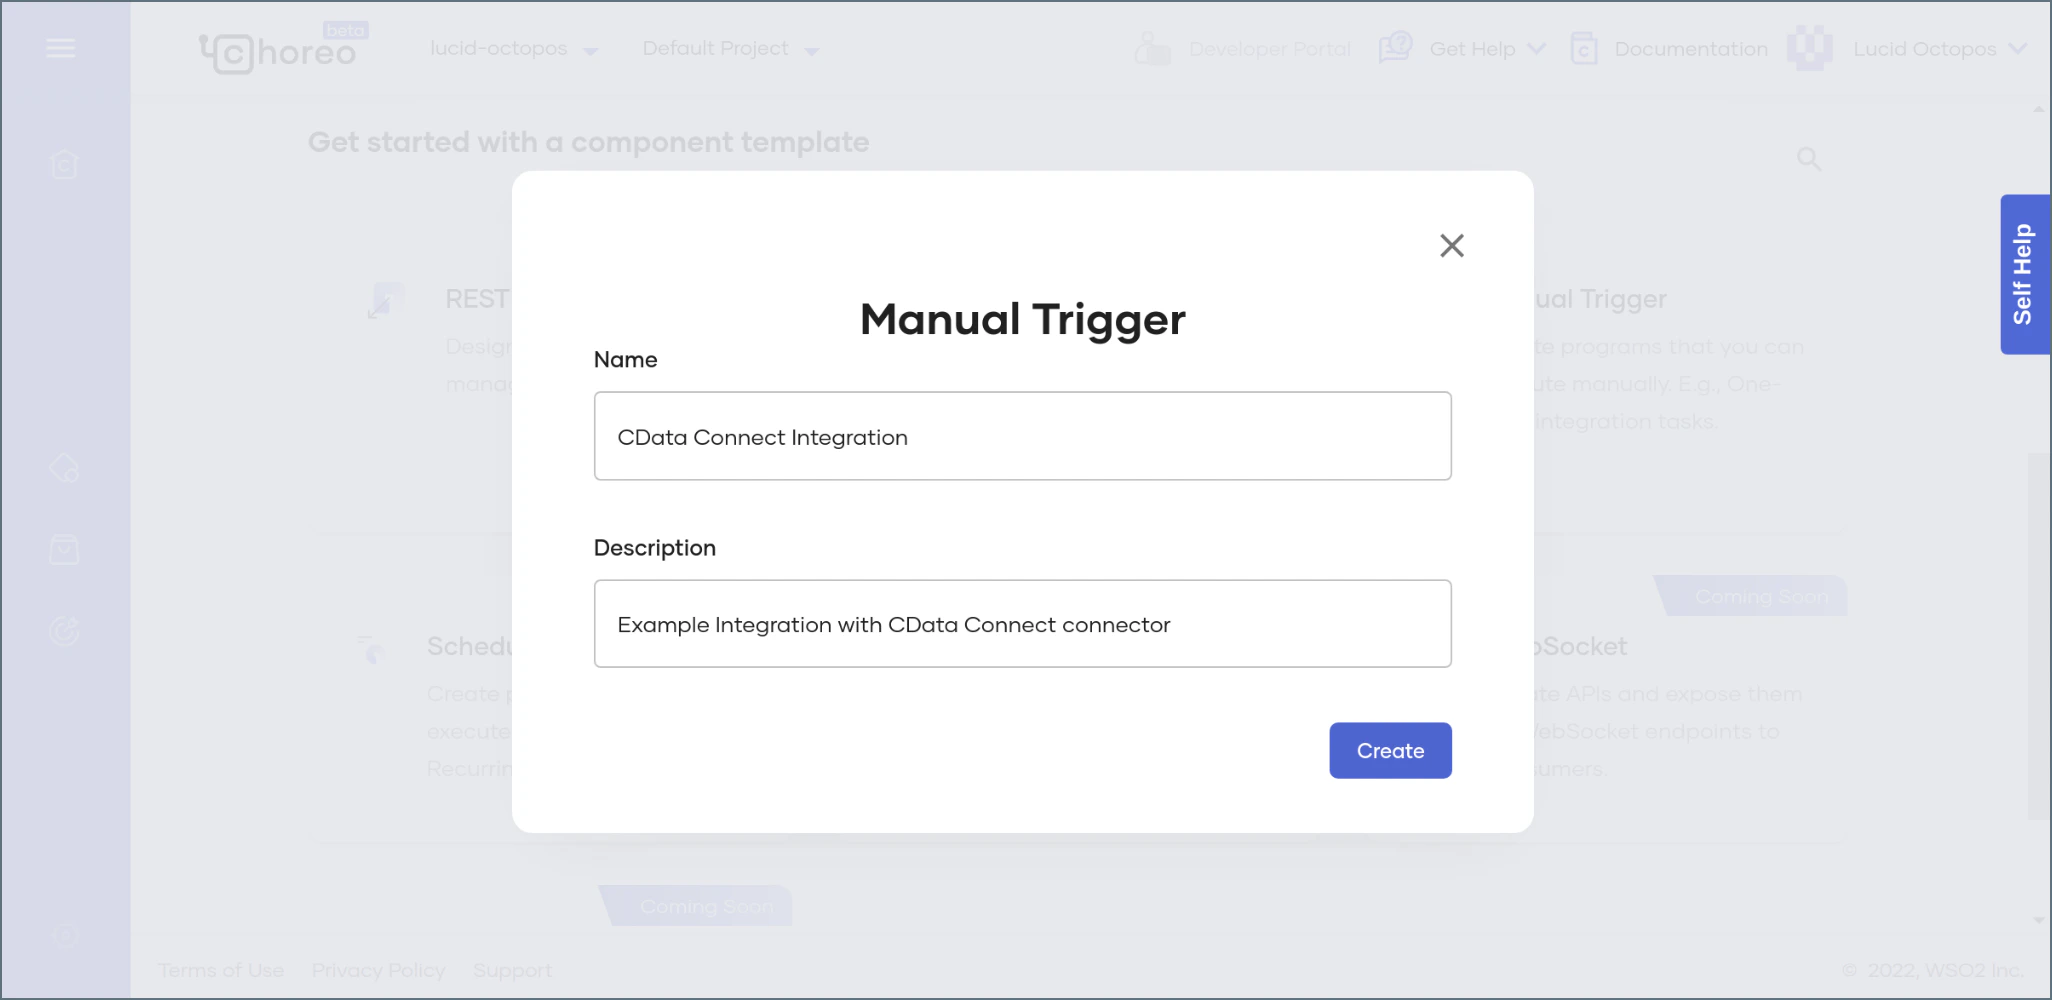
 Enter a **Name** and **Description** for the manual trigger and click **Create**.
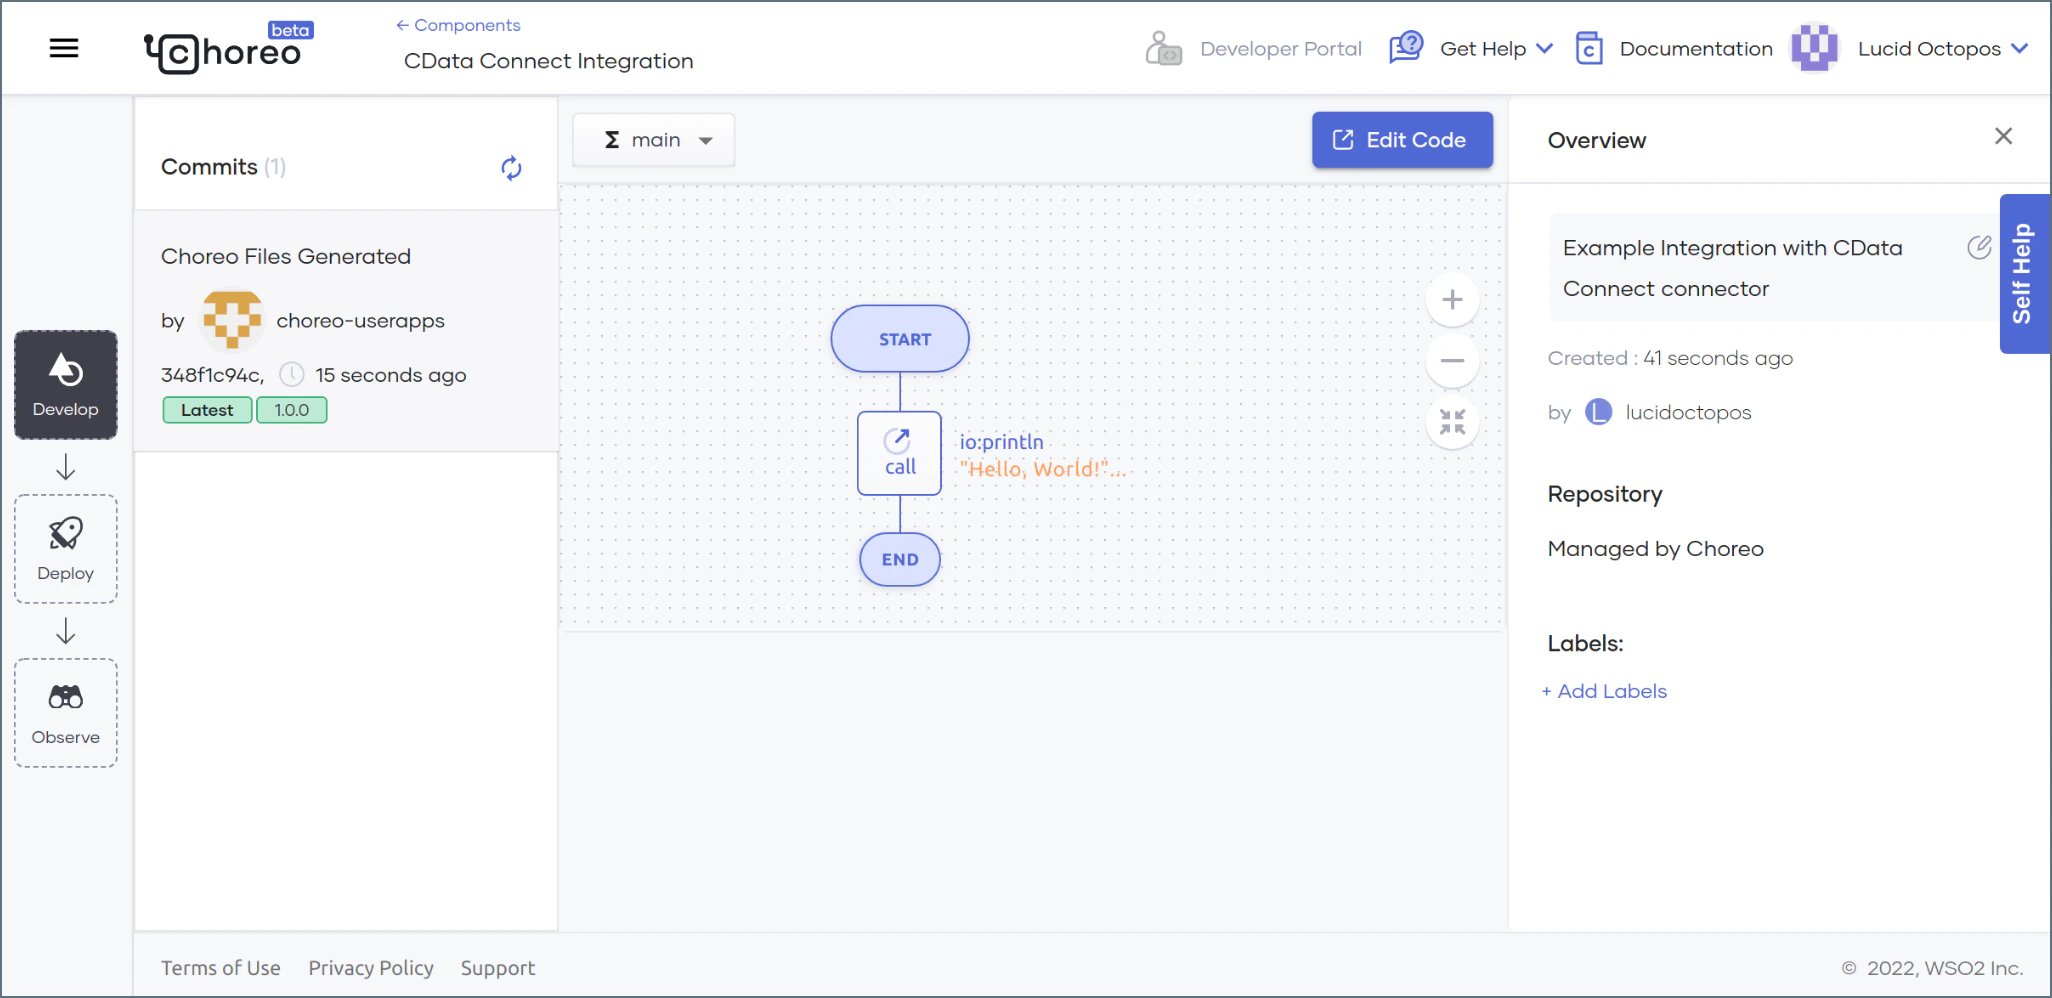
 The manual trigger opens in the **Develop** view.
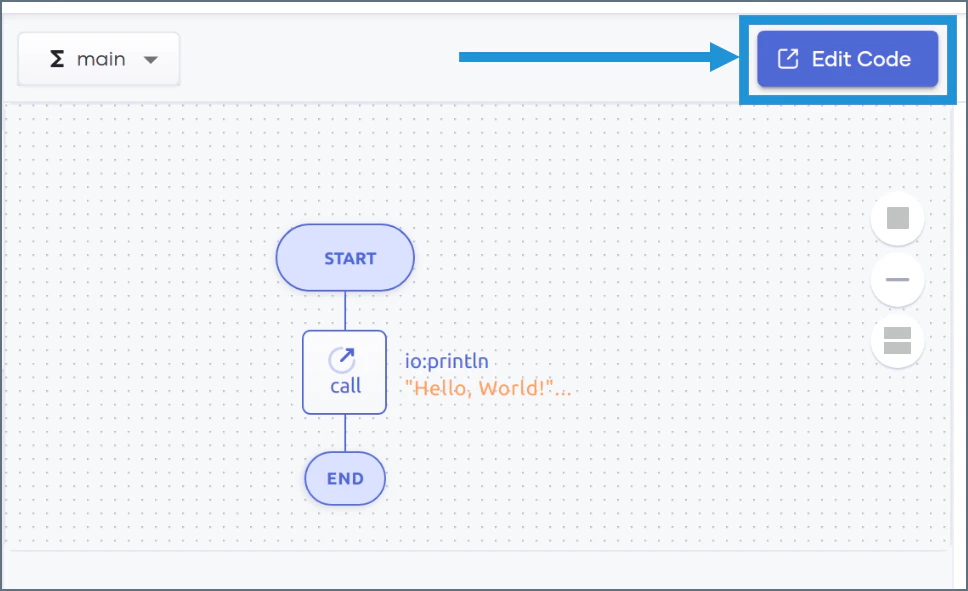
 Click **Edit Code** to open the low-code diagram view.
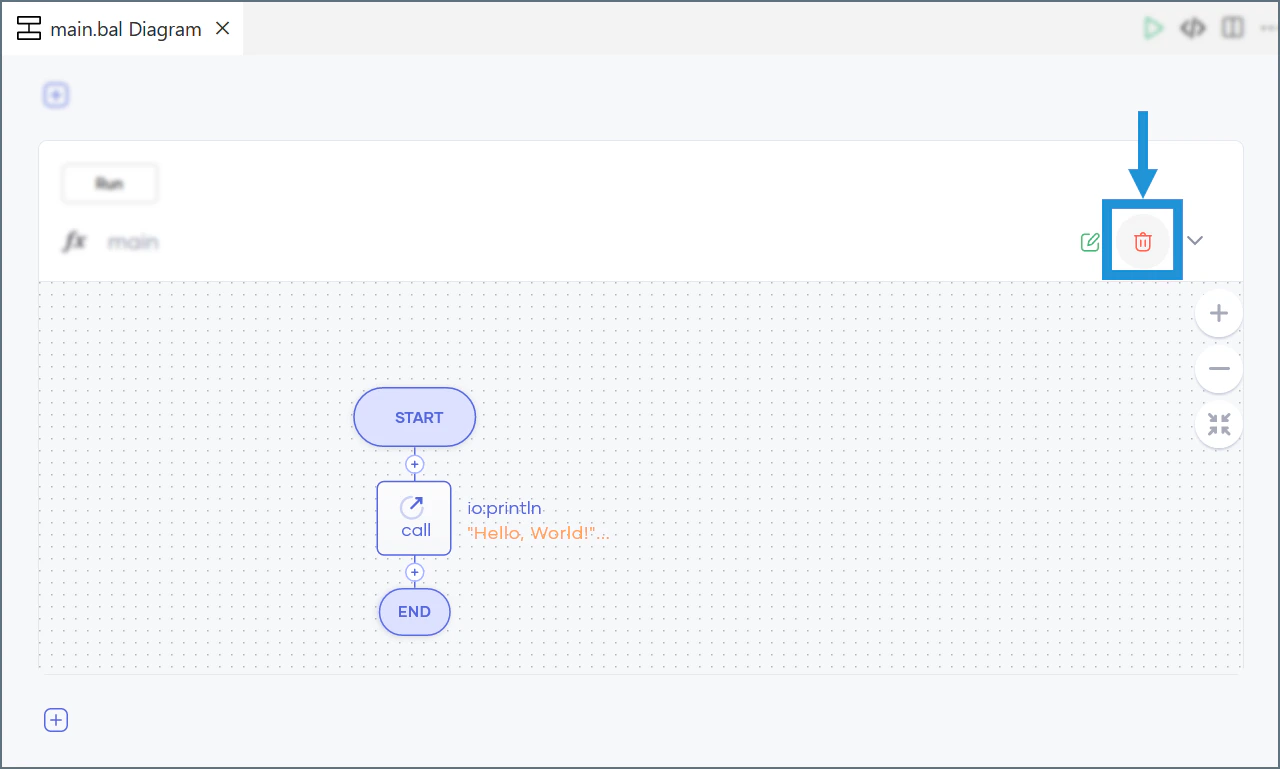
 Choreo automatically generates a construct in the low-code diagram view. Delete this construct by highlighting it and clicking the delete icon.
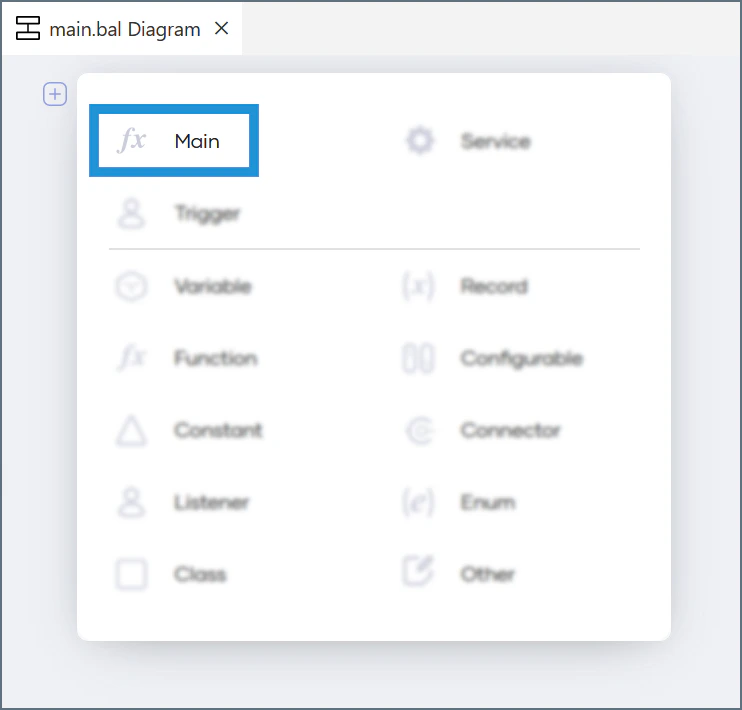
 Choreo prompts you to create a new construct. Click the indicated button to open a list of options, then select **Main**.
 Click **Save** in the settings pane that appears.
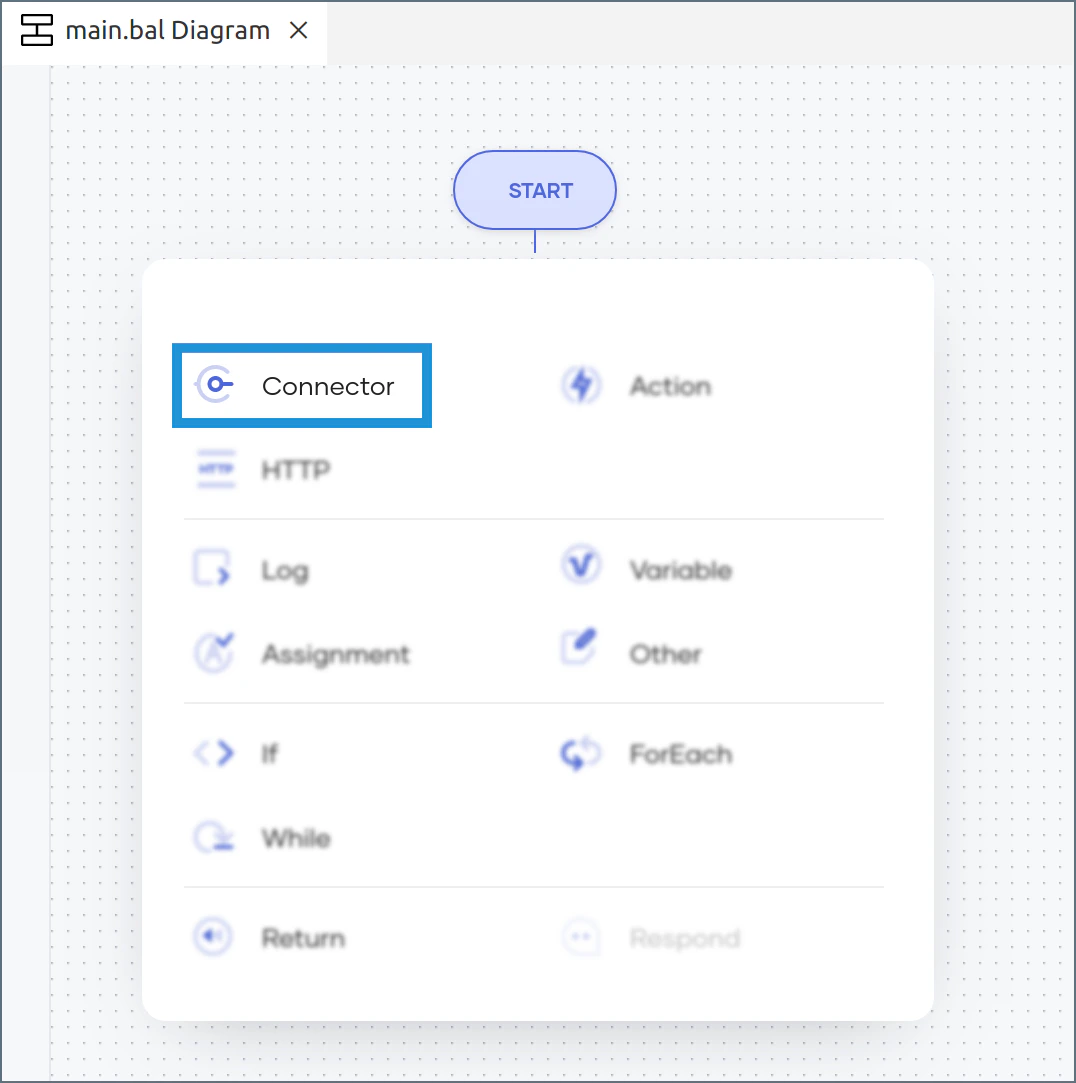
The main construct appears in the diagram view. In the menu that appears under **Start**, click **Connector**.
Click **Save** in the settings pane that appears.
The main construct appears in the diagram view. In the menu that appears under **Start**, click **Connector**.
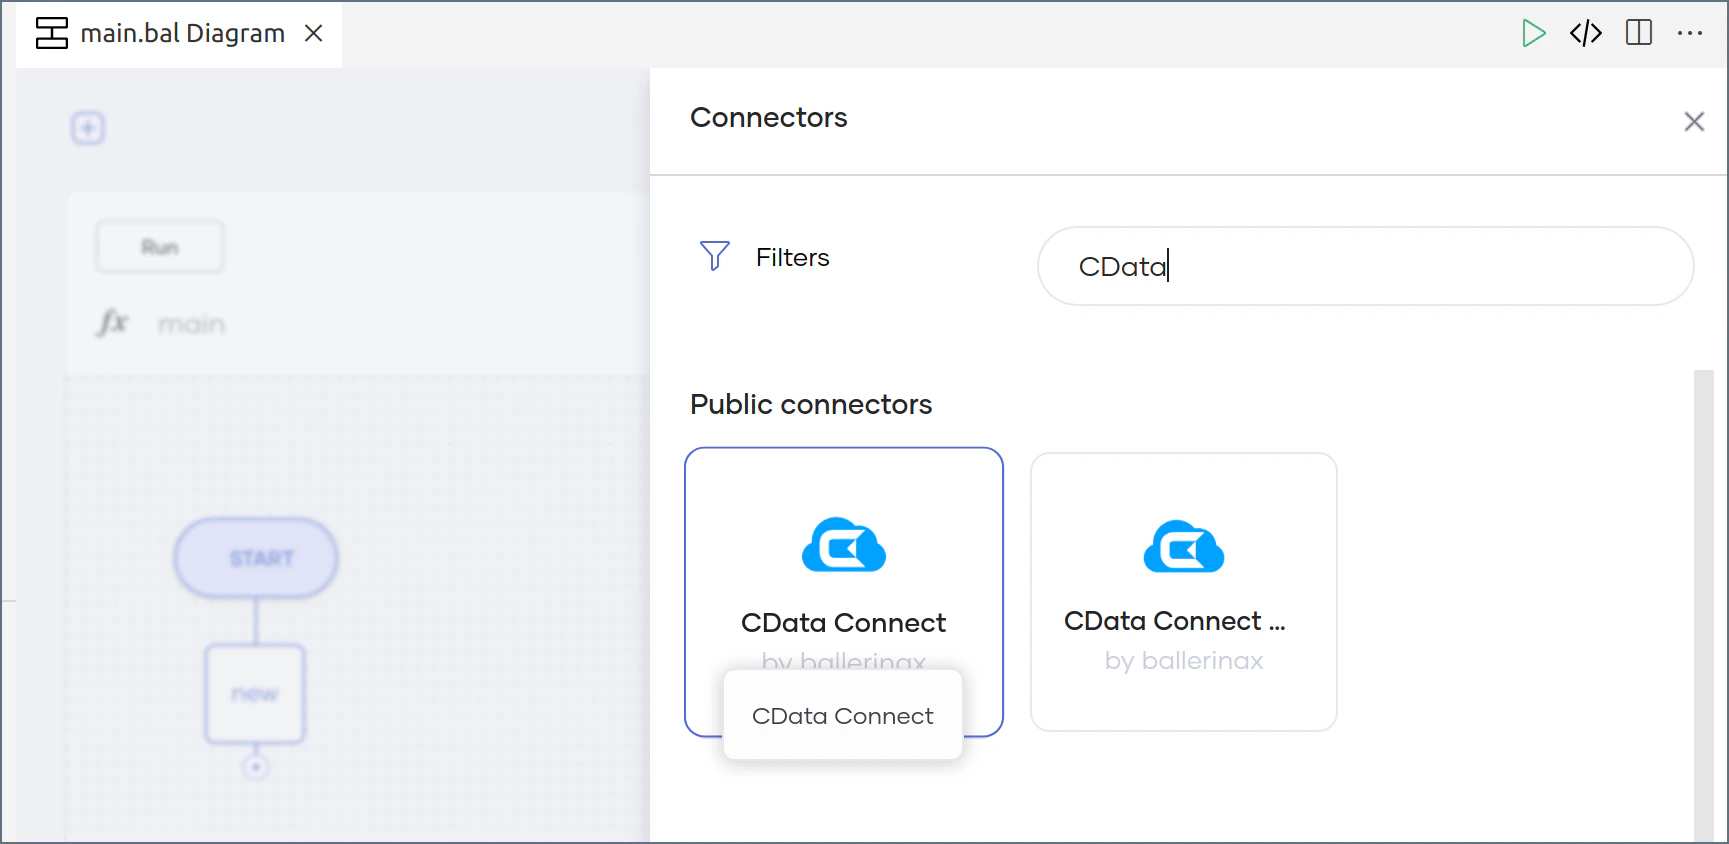
 In the **Connectors** dialog, search for *CData*. Click **CData Connect** to open the **Connector** settings pane.
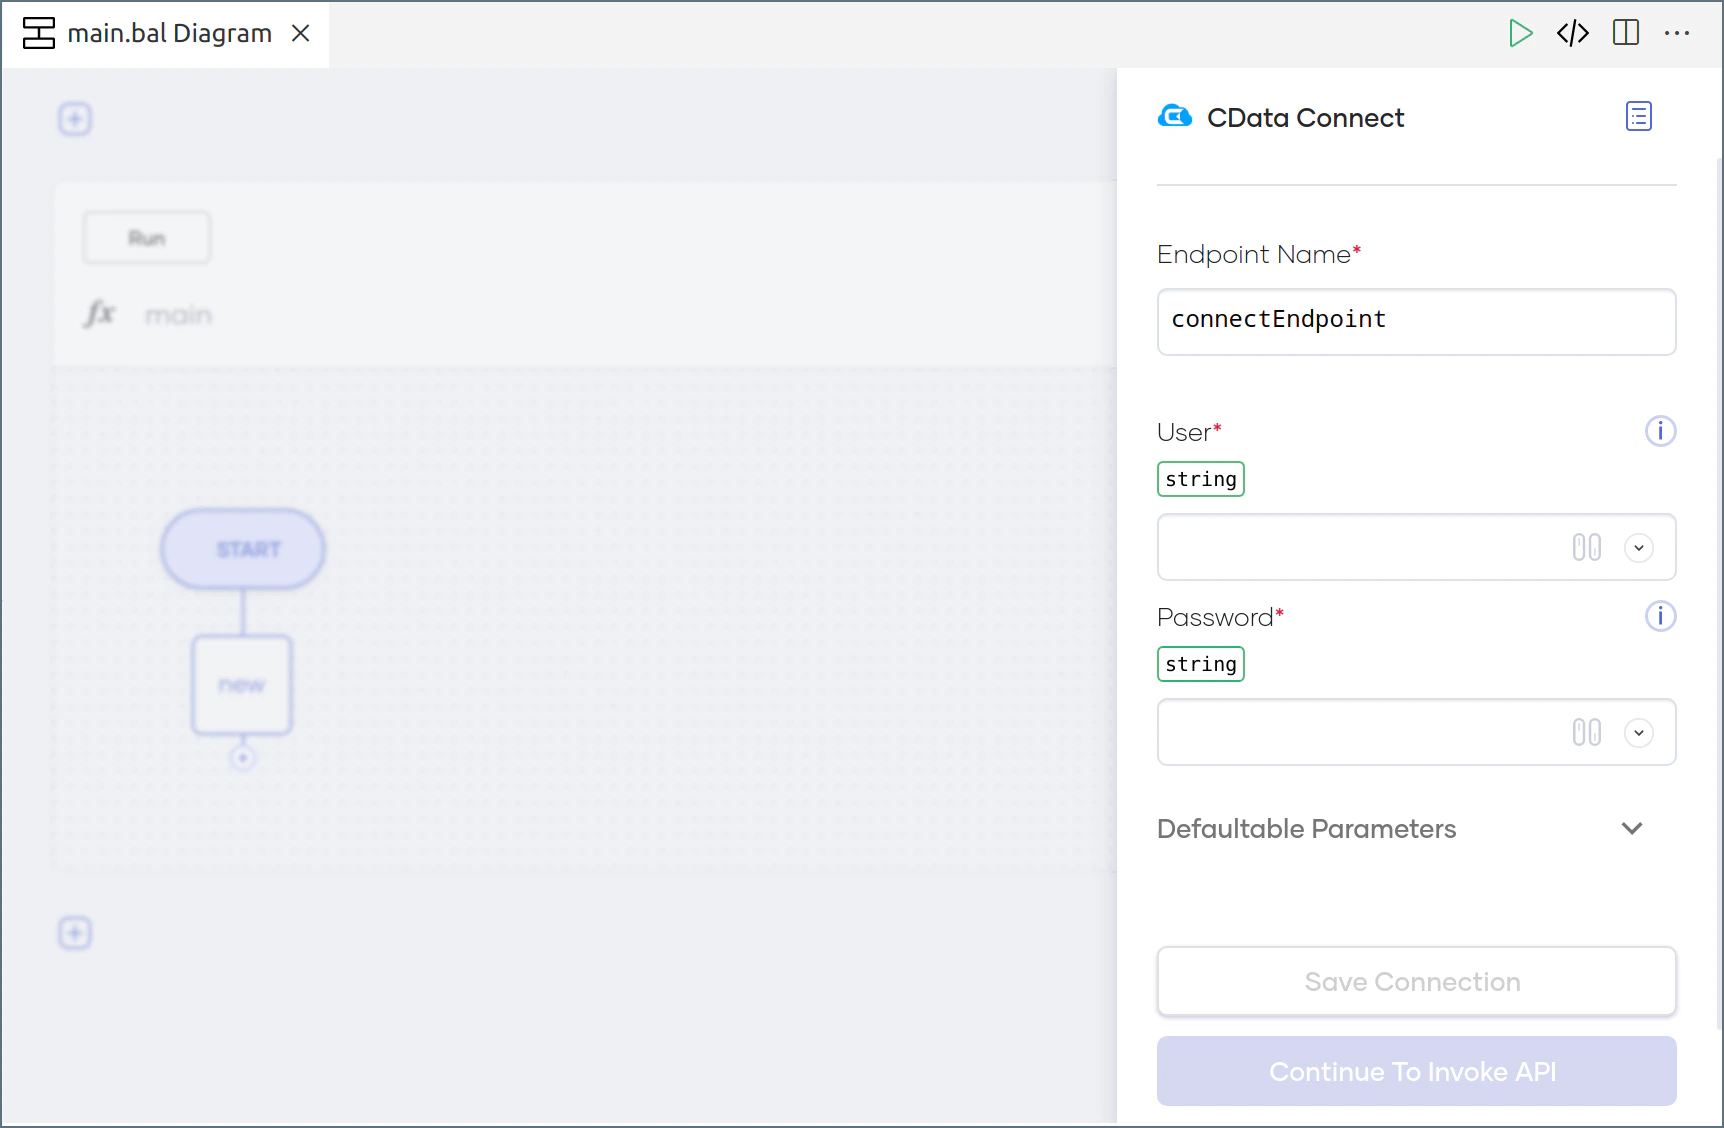
 In the **Connector** settings pane, enter the configuration settings:
* Enter an **Endpoint Name** for your use.
* In the **User** field, enter the email address of the Connect AI user, wrapped in quotation marks (for example, *"[user@cdata.com](mailto:user@cdata.com)"*).
* In the **Password** field, enter the [PAT you generated earlier](#prerequisites), wrapped in quotation marks (for example, *"SampleToken"*).
In the **Connector** settings pane, enter the configuration settings:
* Enter an **Endpoint Name** for your use.
* In the **User** field, enter the email address of the Connect AI user, wrapped in quotation marks (for example, *"[user@cdata.com](mailto:user@cdata.com)"*).
* In the **Password** field, enter the [PAT you generated earlier](#prerequisites), wrapped in quotation marks (for example, *"SampleToken"*).
 Click **Save Connection** to save your settings.
The Connect AI connector appears in both the low-code diagram view and the source code view of the code editor.
Click **Save Connection** to save your settings.
The Connect AI connector appears in both the low-code diagram view and the source code view of the code editor.
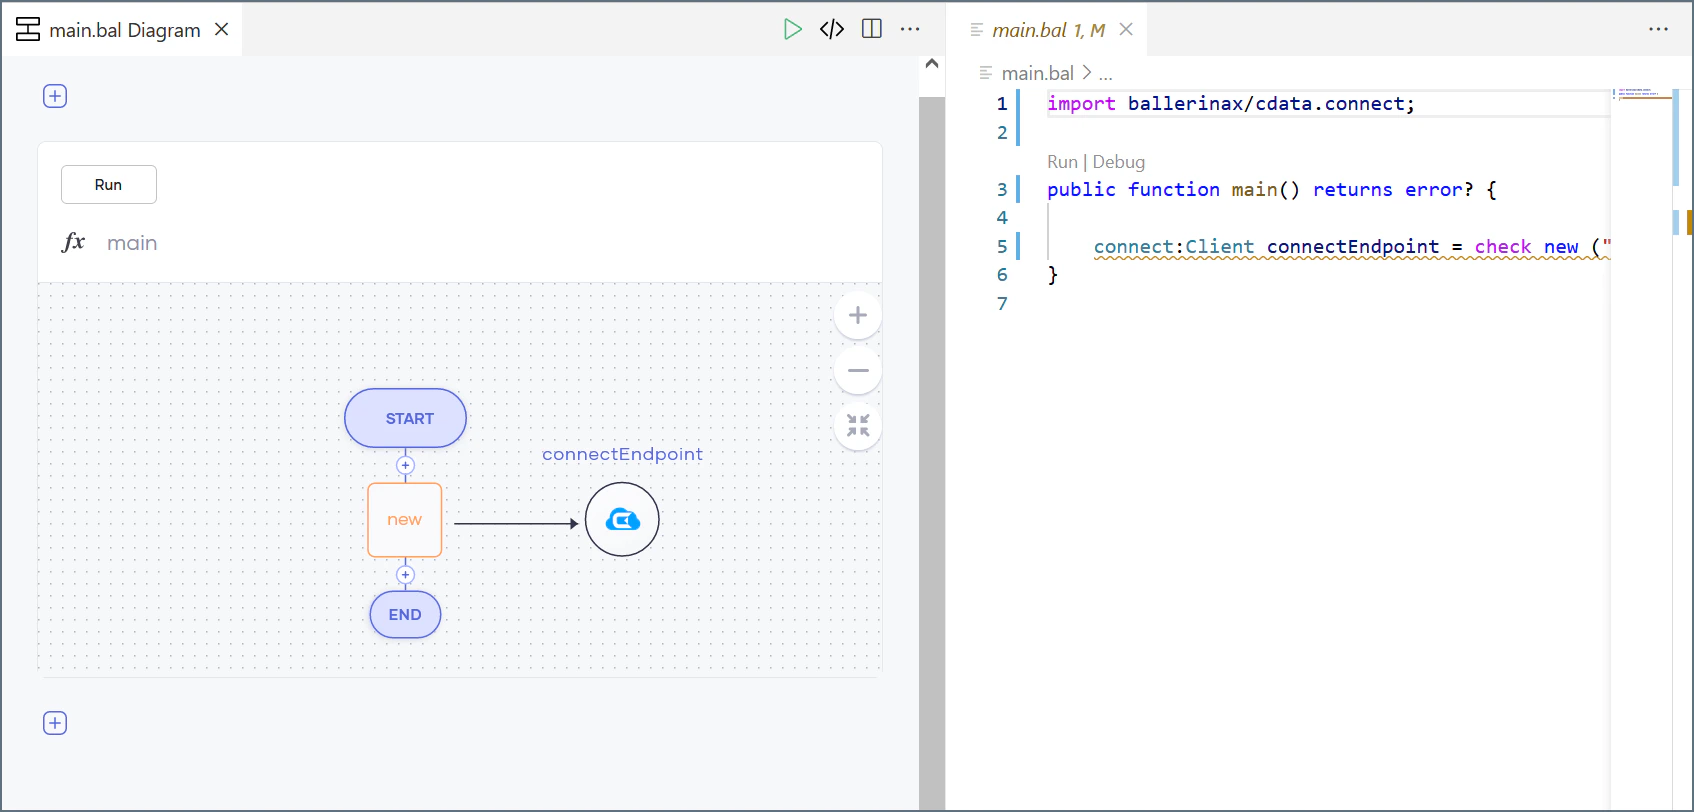 You can now add connector Actions to your application logic.
## Use Connector Actions in Choreo
To add an Action to your application logic, click the **+** icon between the **new** and **End** nodes.
You can now add connector Actions to your application logic.
## Use Connector Actions in Choreo
To add an Action to your application logic, click the **+** icon between the **new** and **End** nodes.
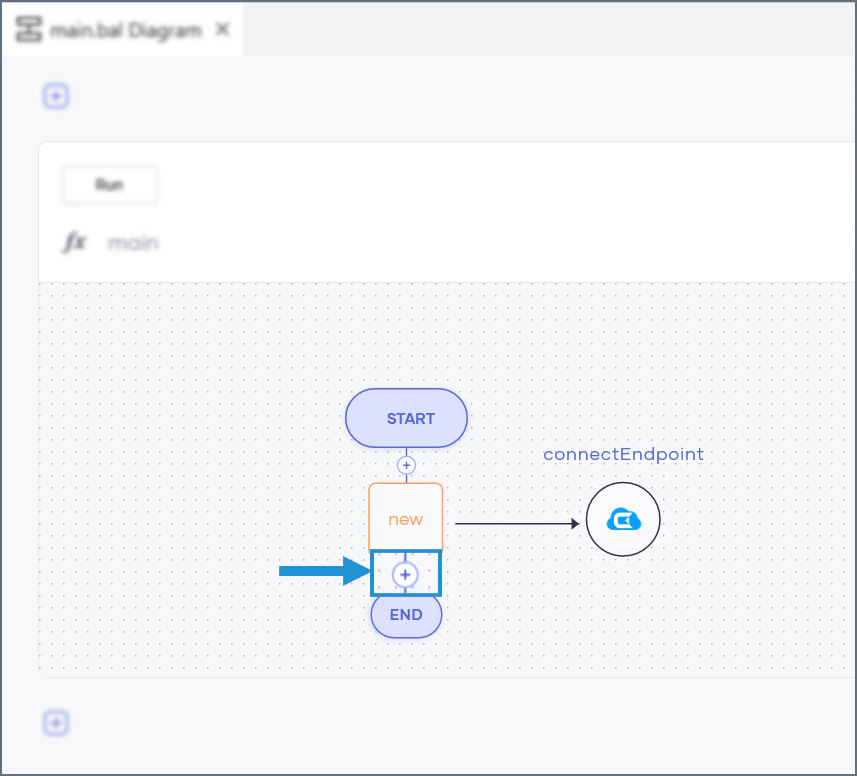 In the menu that appears, click **Action**.
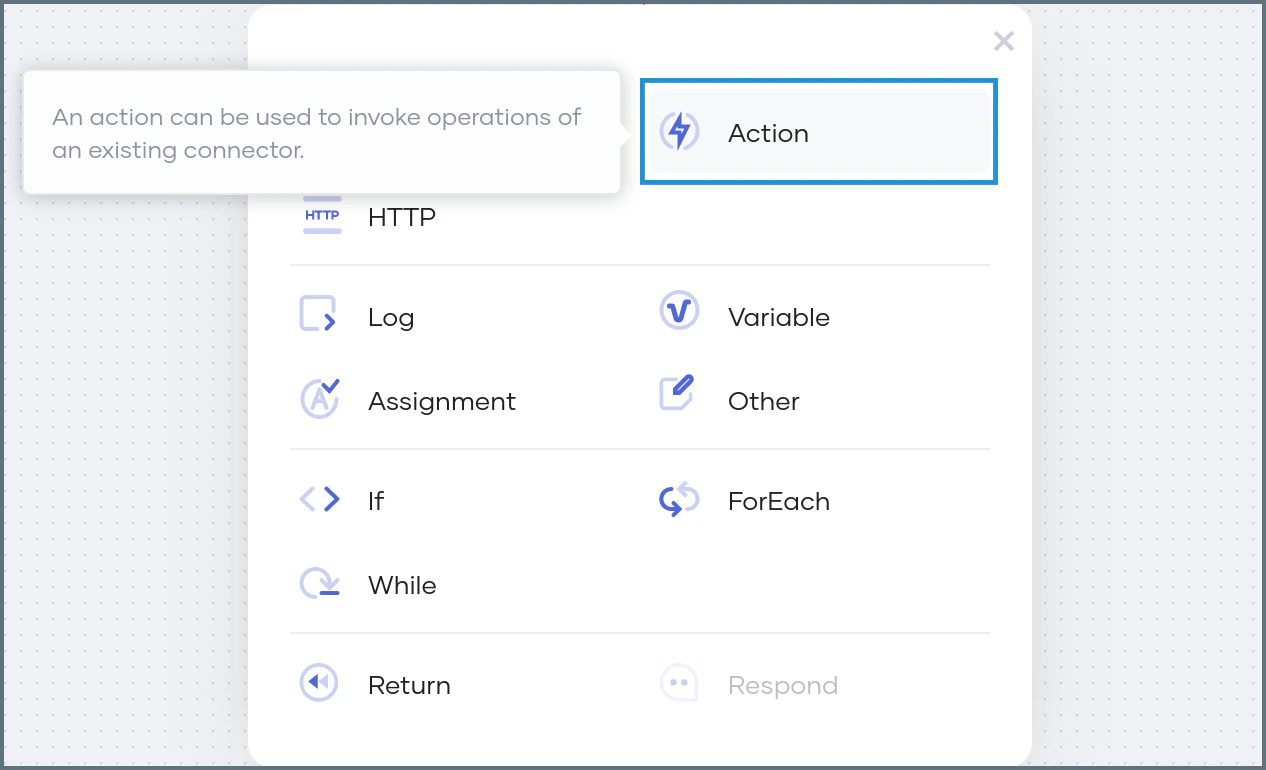 The Connect AI connector supports the following operations:
* **query**—[query data](#query-action) from your data sources
* **queryRow**—query data from a single row of a data source
* **execute**—perform DML and DDL operations
* **batchExecute**—perform a batch of DML and DDL operations
* **call**—execute a stored procedure
For more information about working with these operations, see the [CData Connect Ballerina Guide](https://github.com/ballerina-platform/module-ballerinax-cdata.connect/blob/main/ballerina/Module.md#quickstart).
### Query Action
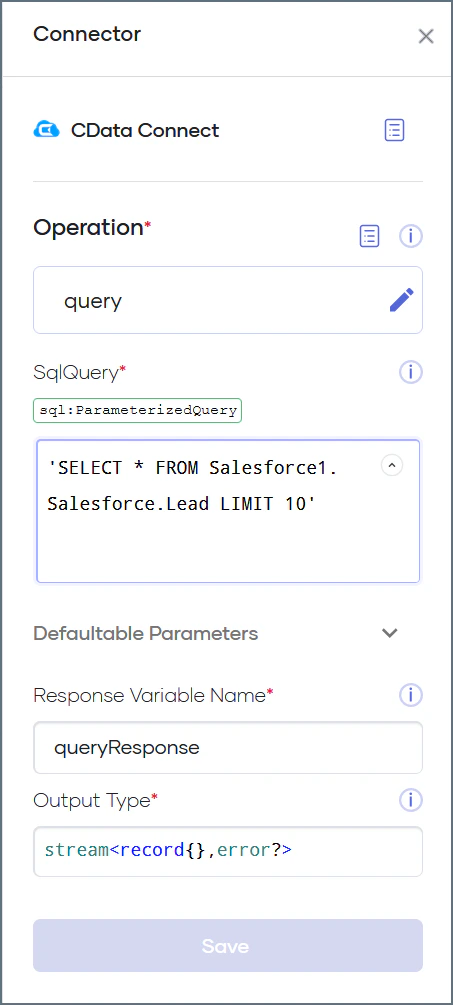
Follow these steps to configure a query action:
Select **query** for the connector **Operation**.
Enter your query in the **SqlQuery** box.
* When writing the query, be sure to specify the **Connection Name** and **Data Source Name** of the data source you want to query. For example, `Salesforce1.Salesforce`.
* These parameters appear on the [Sources](/en/Sources) page of your Connect AI dashboard.
The Connect AI connector supports the following operations:
* **query**—[query data](#query-action) from your data sources
* **queryRow**—query data from a single row of a data source
* **execute**—perform DML and DDL operations
* **batchExecute**—perform a batch of DML and DDL operations
* **call**—execute a stored procedure
For more information about working with these operations, see the [CData Connect Ballerina Guide](https://github.com/ballerina-platform/module-ballerinax-cdata.connect/blob/main/ballerina/Module.md#quickstart).
### Query Action
Follow these steps to configure a query action:
Select **query** for the connector **Operation**.
Enter your query in the **SqlQuery** box.
* When writing the query, be sure to specify the **Connection Name** and **Data Source Name** of the data source you want to query. For example, `Salesforce1.Salesforce`.
* These parameters appear on the [Sources](/en/Sources) page of your Connect AI dashboard.
 Click **Save** to save the action.
## Deploy the Program
Once you have added all of your desired actions to your program, follow these steps:
Commit and push your final source code in the web editor and sync those changes with the Choreo platform.
Click **Deploy** in the left navigation bar of the Choreo Console.
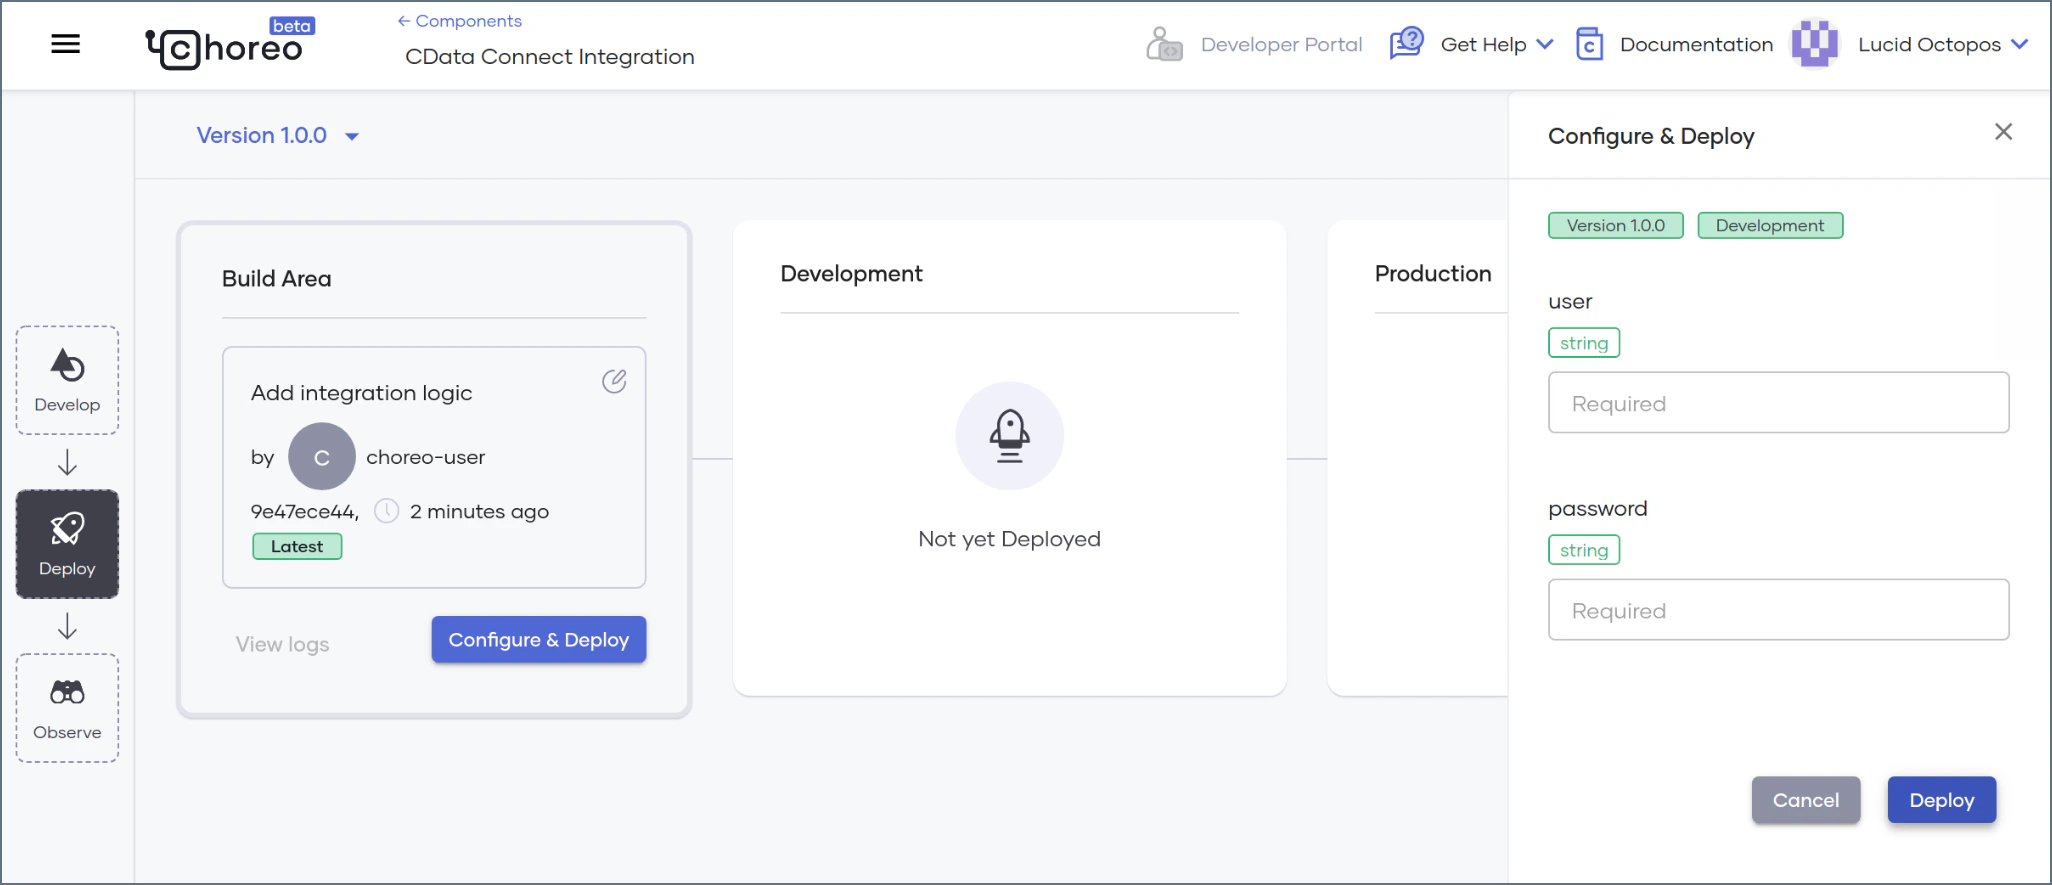
Under **Build Area**, click **Configure & Deploy** to deploy your program.
When prompted, enter the same Connect AI username and password that you used earlier and click **Deploy**.
Click **Save** to save the action.
## Deploy the Program
Once you have added all of your desired actions to your program, follow these steps:
Commit and push your final source code in the web editor and sync those changes with the Choreo platform.
Click **Deploy** in the left navigation bar of the Choreo Console.
Under **Build Area**, click **Configure & Deploy** to deploy your program.
When prompted, enter the same Connect AI username and password that you used earlier and click **Deploy**.
 ## More Information
For more information about using Choreo with Connect AI, see the [CData Connect Ballerina Guide](https://github.com/ballerina-platform/module-ballerinax-cdata.connect/blob/main/ballerina/Module.md#quickstart).
## More Information
For more information about using Choreo with Connect AI, see the [CData Connect Ballerina Guide](https://github.com/ballerina-platform/module-ballerinax-cdata.connect/blob/main/ballerina/Module.md#quickstart).