> ## Documentation Index
> Fetch the complete documentation index at: https://docs.cloud.cdata.com/llms.txt
> Use this file to discover all available pages before exploring further.
# Agent Bricks
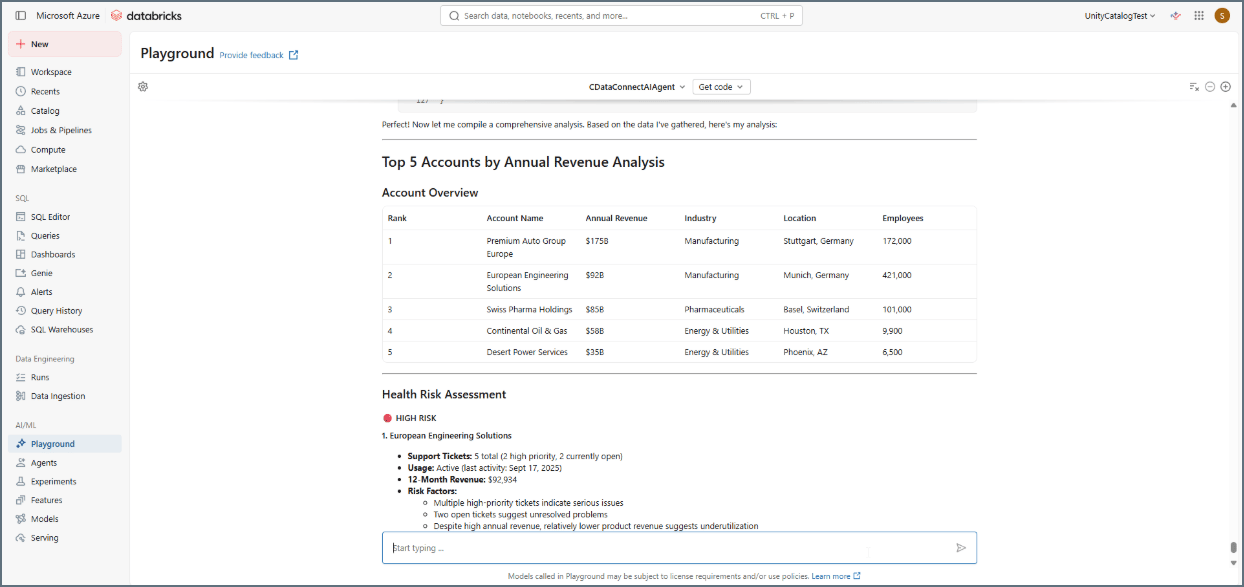
> The Connect AI Remote MCP Service enables Agent Bricks to securely read and take action on your data in real time.
## Prerequisites
Before you can configure and use Agent Bricks with Connect AI, you must first connect a data source to your Connect AI account. See [Sources](/en/Sources) for more information.
## Create an OAuth App in CData Connect AI
Agent Bricks uses OAuth 2.0 to authenticate users against the CData Connect AI MCP Server. This requires an OAuth App in your CData Connect AI account.
The OAuth App requires a callback URL, which you build from your Databricks workspace host. The steps below walk you through constructing this URL and entering it as you create the app.
Click the gear icon in the top-right corner of Connect AI to open **Settings**.
Navigate to **OAuth Apps** and click **+ Create App**. The **Create OAuth App** dialog appears.
Enter the following settings:
* **Name**–enter a descriptive name (for example, *AgentBricksOAuth*).
* **Application Type**–select **Web Application**.
* **Callback URL**–follow the instructions below to create a callback URL.
Open your Databricks workspace in a browser and copy the host from the address bar, everything between `https://` and the next `/`. For example: `adb-5555555555555555.5.azuredatabricks.net`. (AWS workspaces look like `dbc-xxxxxxxx-xxxx.cloud.databricks.com`; GCP like `xxxx.gcp.databricks.com`.)
Append `/login/oauth/http.html` to that host. Using the example above, you would enter the following as the **Callback URL**: *[https://adb-5555555555555555.5.azuredatabricks.net/login/oauth/http.html](https://adb-5555555555555555.5.azuredatabricks.net/login/oauth/http.html)*.
Paste this value into the **Callback URL** field of your Connect AI OAuth app.
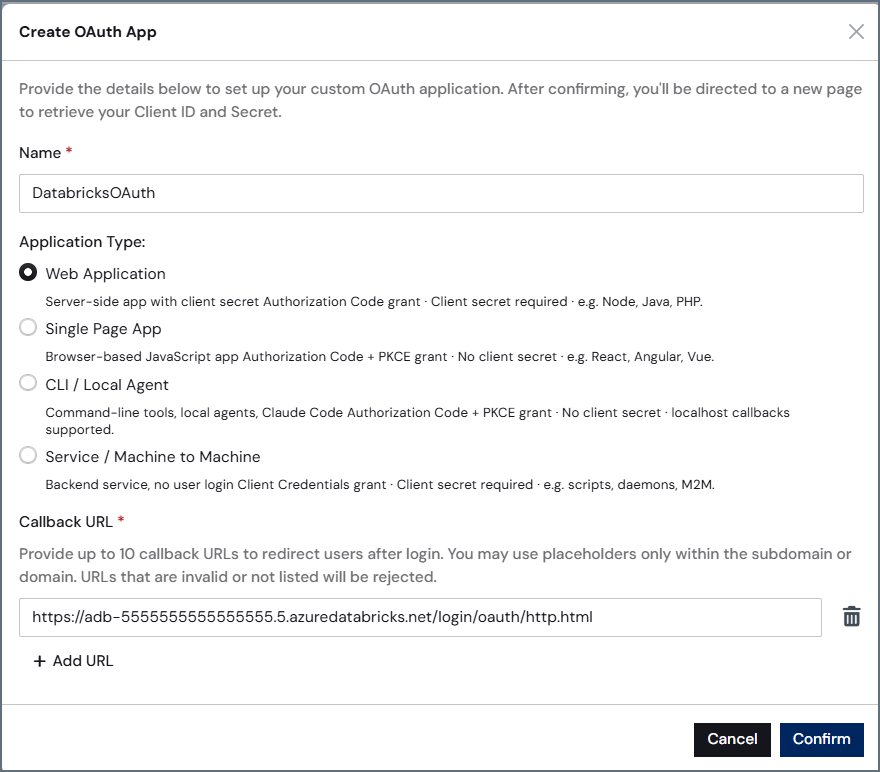 Click **Confirm**. CData Connect AI creates the OAuth app and generates a **Client ID** and **Client Secret** for the client application.
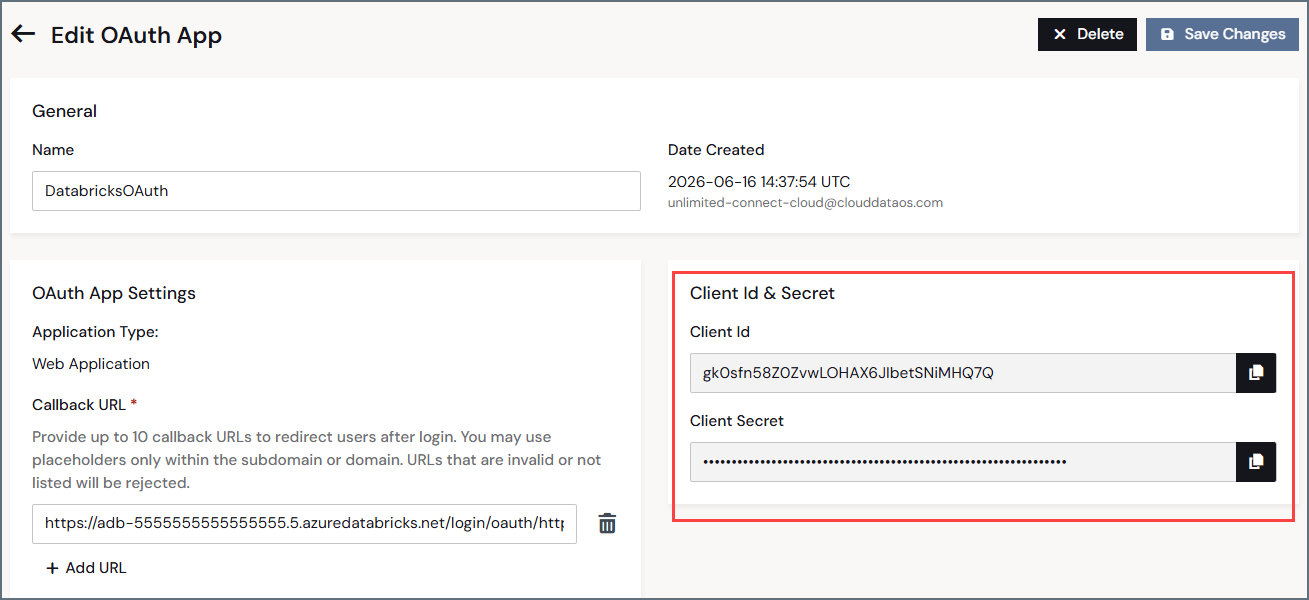 Copy both the **Client ID** and **Client Secret**. You will need them in the next section.
## Create an MCP Server Connection in Databricks
Log in to Databricks and go to **Databricks Marketplace**.
In the search bar, enter *Connect AI*. Click **CData Connect AI: Managed MCP Platform for Enterprise Databricks Agents**.
Copy both the **Client ID** and **Client Secret**. You will need them in the next section.
## Create an MCP Server Connection in Databricks
Log in to Databricks and go to **Databricks Marketplace**.
In the search bar, enter *Connect AI*. Click **CData Connect AI: Managed MCP Platform for Enterprise Databricks Agents**.
 Click **Install**. A dialog appears:
 Enter the **Connection name** for the app, such as **QueryMCP**.
**Host** and **Base path** are pre-filled.
Enter the **Client ID** and **Client Secret** you copied from the OAuth App you created in the previous section.
Select the checkbox to accept the terms and conditions, then click **Install**.
## Create an Agent in Databricks
In the **Agents** tab, click **Create Agent**.
Select **Supervisor Agent**.
In the **Create Supervisor Agent** dialog, enter the following:
* **Name**–enter a name for your agent.
* **Description**–enter a description of the agent.
* **Configure Agents**:
* **Type**–select **External MCP Server**.
* **Unity Catalog connection**–select the MCP connection you made in the previous step.
* **Describe the content**–enter a description of what the MCP connection is.
Enter the **Connection name** for the app, such as **QueryMCP**.
**Host** and **Base path** are pre-filled.
Enter the **Client ID** and **Client Secret** you copied from the OAuth App you created in the previous section.
Select the checkbox to accept the terms and conditions, then click **Install**.
## Create an Agent in Databricks
In the **Agents** tab, click **Create Agent**.
Select **Supervisor Agent**.
In the **Create Supervisor Agent** dialog, enter the following:
* **Name**–enter a name for your agent.
* **Description**–enter a description of the agent.
* **Configure Agents**:
* **Type**–select **External MCP Server**.
* **Unity Catalog connection**–select the MCP connection you made in the previous step.
* **Describe the content**–enter a description of what the MCP connection is.
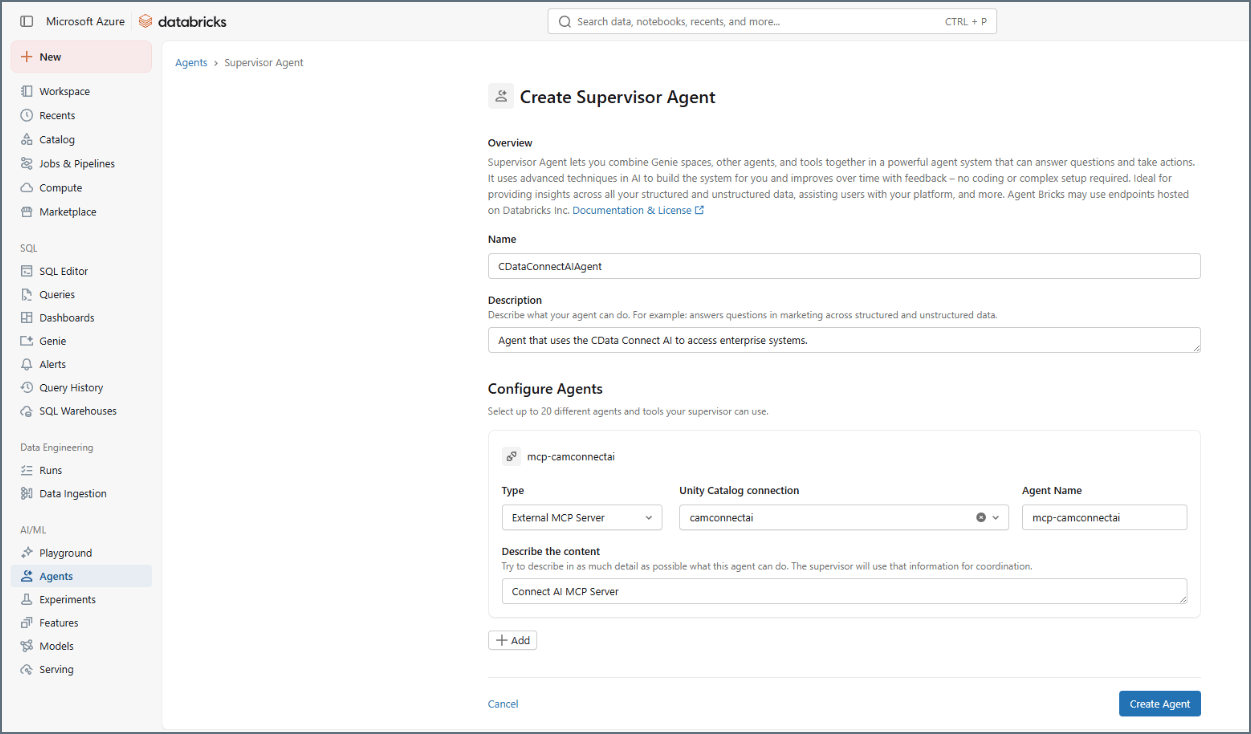 Click **Create Agent**.
## Test your Agent
On your agent’s page, click **Open in Playground**.
Click **Create Agent**.
## Test your Agent
On your agent’s page, click **Open in Playground**.
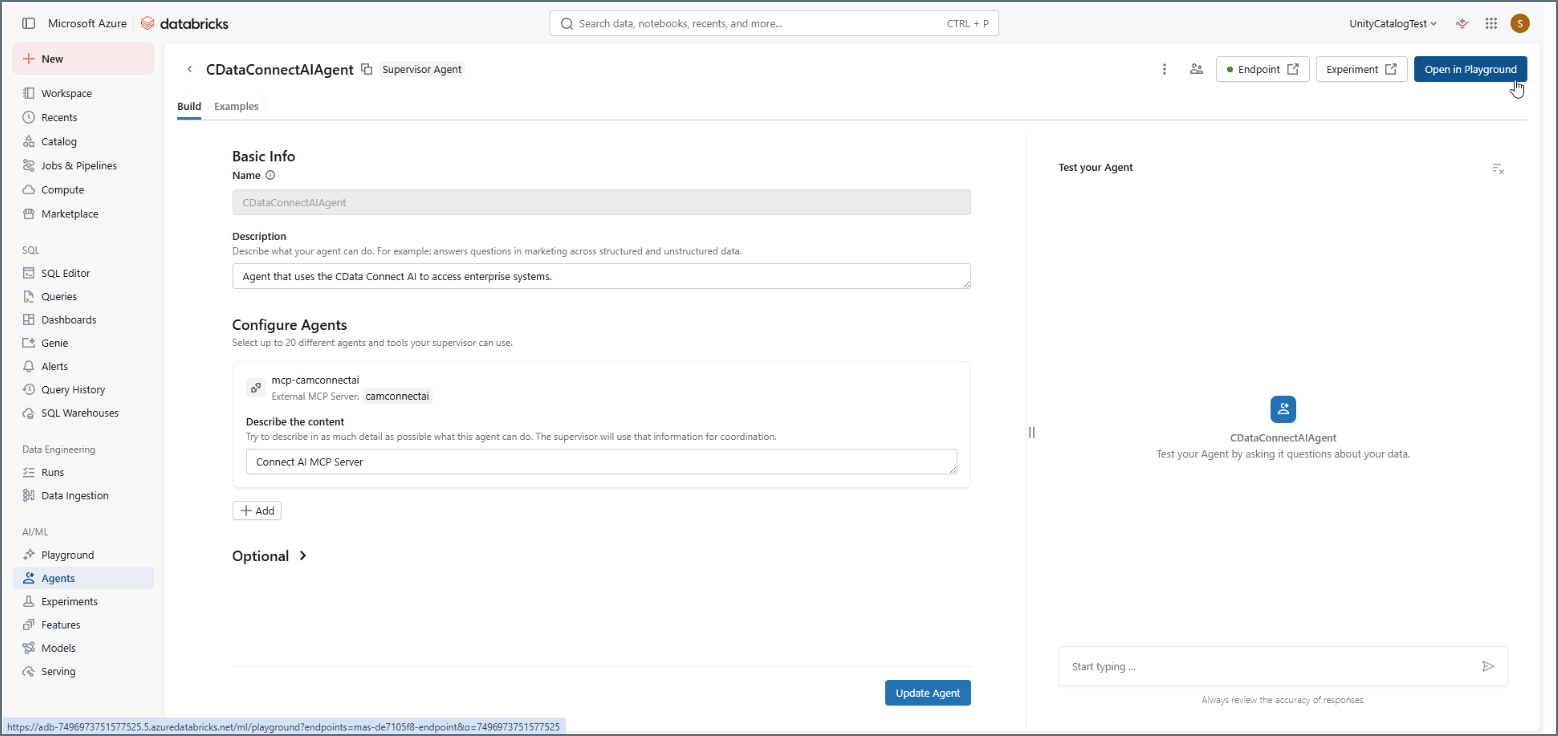 You can now query your connected data with the Connect AI MCP Server through the Supervisor Agent.